If you've ever tried baking a favorite recipe at a high altitude only to end up with a flat, crumbly disaster, you're not alone. It's not you—it's the science. Once you climb above 3,000 feet, the rules of cooking and baking change right along with the scenery.
Adjusting for high altitude is all about making a few small, but critical, changes. We're usually talking about decreasing leavening agents like baking soda, cutting back on sugar, adding a bit more liquid, and sometimes even bumping up the oven temperature. These tweaks are designed to counter the effects of lower air pressure, which can make your baked goods rise way too fast and then collapse.
Why Your Recipes Fail at High Altitude
That beautiful cake rises dramatically in the oven, only to sink into a dense, sad crater as it cools. Sound familiar? This happens because the lower atmospheric pressure up here creates a domino effect in your kitchen. Understanding what's going on is the first step to finally getting those perfect, sea-level results.
The Science Behind High Altitude Cooking
The primary challenge is the reduced air pressure, which throws a wrench into your recipes in a few key ways:
- Leavening Agents Go Wild: Think of baking soda and powder as gas producers that make your baked goods light and airy. With less air pressure pushing down, these gases expand much more quickly and forcefully. This is what causes that initial, impressive rise before the cake's structure has had a chance to set, leading to the inevitable collapse. You can learn more about the difference between baking soda and baking powder to see how they function.
- Liquids Evaporate Faster: The dry mountain air means moisture escapes from your batter more quickly in the oven. This can leave your cakes and breads dry and also concentrates the sugar, which weakens the overall structure.
- Water Boils Sooner: The boiling point of water drops as you go higher. For instance, at 5,000 feet, water boils at around 204°F instead of the usual 212°F. This means things like pasta, beans, and stews will need more time on the stove to cook through.
These factors work together, creating a perfect storm for baking failures. That beautiful rise you see is often just large, unstable air bubbles that the weak, under-baked structure simply can't hold up.
The key takeaway is that recipes developed at sea level rely on a specific amount of air pressure to work as written. When you take that pressure away, you have to step in and manually adjust the ingredients to restore the balance needed for great structure, moisture, and texture.
For a quick overview, here’s a chart to help you get started.
Quick Guide to High Altitude Adjustments
This table summarizes the most common adjustments you'll need to make. Use it as a starting point, and don't be afraid to tweak things a little based on your own results!
Altitude
Increase Liquid
Decrease Leavening
Decrease Sugar
Increase Oven Temp
3,000 ft
+1 to 2 Tbsp
-1/8 tsp
-1 to 2 tsp
+15° to 25°F
5,000 ft
+2 to 4 Tbsp
-1/4 tsp
-1 to 3 Tbsp
+15° to 25°F
7,000 ft
+3 to 4 Tbsp
-1/2 tsp
-2 to 4 Tbsp
+15° to 25°F
Remember, every kitchen and recipe is a bit different. These are fantastic guidelines, but your own experience will be the best teacher.
Making Precise Baking Adjustments That Work
Alright, let's get down to the practical side of things. Knowing why recipes fail at high altitudes is one thing, but knowing exactly what to do about it is where the real kitchen magic happens. This isn't about guesswork; it’s about making small, specific changes to your favorite recipes to get them working for you again.
Think of it less like rewriting a recipe and more like fine-tuning it. We're going to focus on four key areas: leavening, liquid, sugar, and oven temperature. Tiny tweaks here and there can be the difference between a sad, sunken cake and a perfectly risen one. To nail these adjustments, I can't stress enough how important it is to use a set of accurate measuring scoops. Precision is your best friend here.
This flowchart really shows what we're up against.
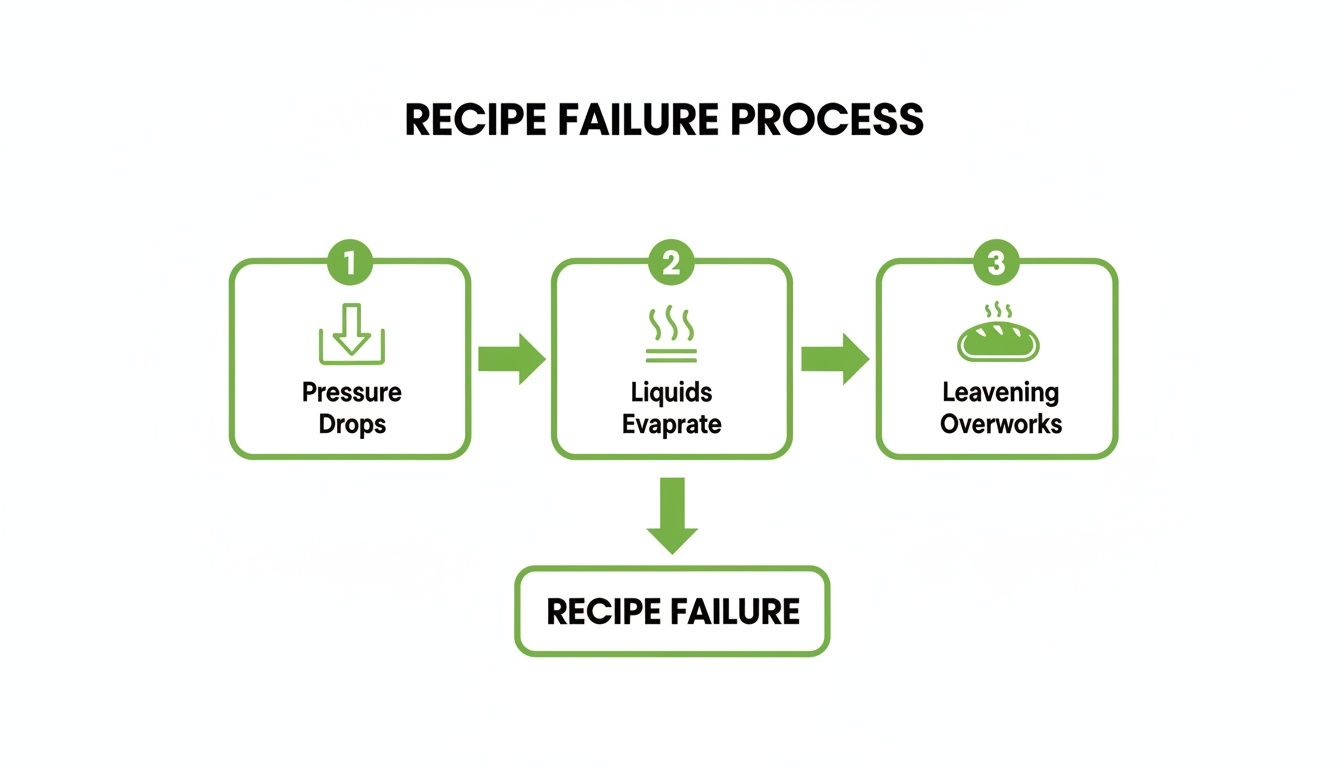
See how that chain reaction creates a perfect storm? The good news is we can step in at each stage and counteract the effects.
Taming Your Leavening Agents
Up here, leavening agents like baking soda and baking powder go into overdrive. The lower air pressure lets the gases they create expand way too fast. The result? Your cakes and breads shoot up dramatically and then collapse before the structure has a chance to set.
The fix is surprisingly simple: just use less. By dialing back the leavening, you slow down that initial rise, giving the flour and proteins time to build a solid, stable structure.
Here’s a good starting point for reductions:
- At 3,000 feet: Decrease by 1/8 teaspoon for every teaspoon the recipe calls for.
- At 5,000 feet: Decrease by 1/8 to 1/4 teaspoon per teaspoon.
- At 7,000 feet: Decrease by 1/4 teaspoon per teaspoon.
So, if a cookie recipe from sea level asks for 1 teaspoon of baking soda and you're at 5,000 feet, you'd start by using only 3/4 teaspoon. It's a tiny change, but it makes a huge difference in preventing those dreaded craters and over-spread cookies.
Boosting Moisture with Liquids and Flour
The air at higher elevations is incredibly dry, and it pulls moisture right out of your batter. This is why things often turn out crumbly and stale-tasting. To fight back, you’ll need to add a bit more liquid.
Adding a little extra milk, water, or oil helps keep the flour hydrated and gives you a much more tender result. I usually start by adding a bit more liquid for every cup the recipe lists.
- At 3,000 feet: Add 1 to 2 extra tablespoons of liquid.
- At 5,000 feet: Add 2 to 4 extra tablespoons of liquid.
- At 7,000 feet: Add 3 to 4 extra tablespoons of liquid.
Sometimes, just adding more liquid makes the batter too loose. If you find the structure is still a bit weak, a touch of extra flour can provide the gluten needed to hold it all together. I recommend adding one extra tablespoon of flour at 3,000 feet, and another for every 1,500 feet you go up.
Reducing Sugar for Better Structure
Sugar isn’t just for sweetness; it also tenderizes by getting in the way of gluten development. At sea level, that’s great for a soft texture. But at high altitude, where the structure is already weak, too much sugar can cause a total collapse.
On top of that, liquids evaporate faster, which concentrates the sugar and weakens the structure even more. By cutting back on the sugar just a bit, you give the gluten and eggs a fighting chance to form a strong network that can hold its shape.
Pro Tip: Don't go crazy here. Sugar is still vital for moisture and browning. A small reduction is all it takes to bring things back into balance and keep your bakes from turning gummy or falling apart.
For every cup of sugar in the recipe, try these adjustments:
- At 3,000 feet: Decrease by 1 tablespoon.
- At 5,000 feet: Decrease by 2 tablespoons.
- At 7,000 feet: Decrease by up to 3 tablespoons.
This simple tweak gives your baked goods the backbone they need to stand tall in the thin air.
Increasing Oven Temperature for a Quicker Set
Last but not least, let's talk about the oven. Since everything rises faster up here, you need the structure to set faster to trap those air bubbles before they escape. The best way to do that is to turn up the heat.
A hotter oven helps the crust form quickly, giving your bake the support it needs to avoid collapsing. As a general rule, I increase the oven temperature by 15°F to 25°F. For most recipes, that 25°F bump is the sweet spot. For example, a recipe that calls for 350°F should be baked at 375°F.
Just remember, a hotter oven means a shorter bake time. Start checking for doneness earlier than you normally would. A good guideline is to knock 5-8 minutes off the bake time for every 30 minutes in the original recipe. For more precise numbers, you can look up a detailed oven temperature conversion table to find the perfect setting for your kitchen.
Adapting Your Stovetop and Slow Cooker Meals
When people talk about high-altitude cooking, collapsed cakes and sad, flat cookies usually get all the attention. But the science behind those baking fails—lower air pressure—messes with just about everything you make, including meals on your stovetop or in the slow cooker.
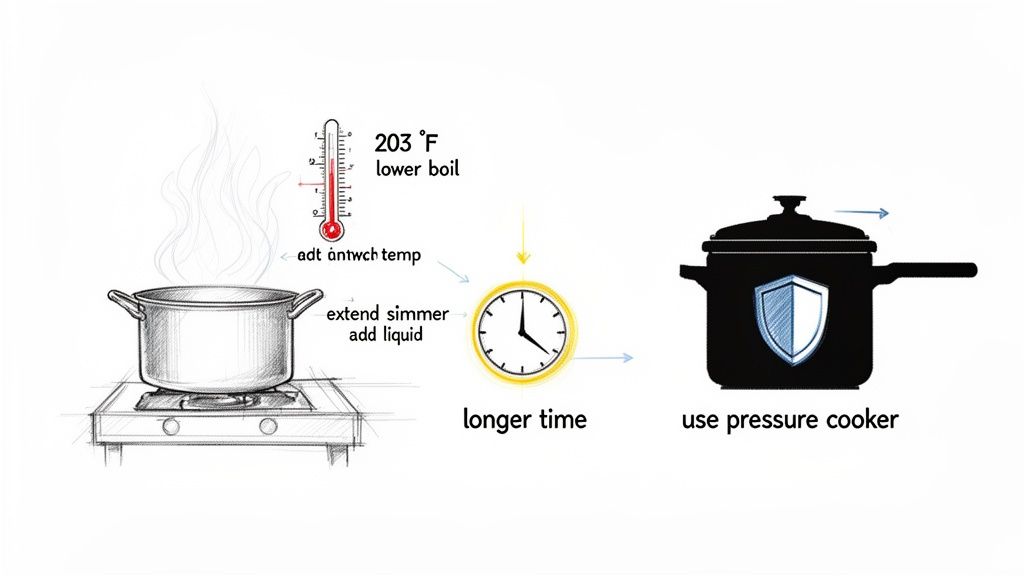
The real game-changer here is water's boiling point. Down at sea level, water boils at 212°F. But the higher you go, the lower that temperature gets. If you're in Denver at 5,280 feet, your water is boiling at a mere 203°F. This might not seem like a big deal, but it means anything you boil, simmer, or steam is cooking at a lower temperature and will take a lot longer to get done.
This one simple fact is why your pasta comes out chalky, your rice has a crunchy center, and your dried beans seem to simmer for an eternity without ever getting soft.
Adjusting for a Lower Boiling Point
For most things you cook on the stove, the fix is simple, though it does require a bit of extra patience: you just have to cook it longer. Anything that needs to simmer or boil to become tender will need more time in that hot (but not as hot) water.
A stew recipe that calls for an hour of simmering might need an extra fifteen minutes or more. There's no magic formula, but I've found a good rule of thumb is to start checking for doneness around the recipe's original cook time, then add time in 10-15 minute chunks until everything is perfect.
Here’s how this plays out with a few kitchen staples:
- Pasta: Just add a few extra minutes to whatever the package says. I usually start taste-testing a minute or two after the recommended time to nail that al dente bite.
- Rice: Rice needs more time, but it also needs more water because liquids evaporate faster up here. I add an extra 2-3 tablespoons of water for every cup of rice and plan on 5-10 more minutes of cooking.
- Dried Beans: These are notoriously stubborn at high altitudes. Soaking them overnight is an absolute must. Even then, plan on increasing the cooking time by at least 25%, and keep an eye on the liquid level, as you'll likely need to top it off.
The biggest mental shift for high-altitude stovetop cooking is to stop trusting the clock. Cook until the food is done, not until the timer goes off. Use your senses—is the meat falling apart? Are the carrots tender?—to know when it's ready.
Why Your Slow Cooker Needs Extra Time
Slow cookers feel this change in boiling point acutely. They're designed to hold food at a gentle simmer, but at altitude, that "gentle simmer" is happening at a cooler temperature. So, everything just takes longer.
For most slow cooker recipes, you’ll need to tack on a significant amount of extra time. If a recipe says 8 hours on low, I'd plan for 9 or even 10 hours at 5,000 feet to get that perfectly tender result. You also have to watch out for sauces getting too thick from the extra evaporation. Adding a splash more broth or water at the start usually does the trick. And if your sauce ends up too thin, our guide on how to thicken sauce in a Crock Pot has some easy fixes.
The Pressure Cooker Is Your Best Friend
Honestly, if you live at a high altitude, a pressure cooker is one of the best tools you can own. It's the ultimate workaround for long-cooking foods like tough cuts of meat or those stubborn dried beans. It completely cancels out the effects of low atmospheric pressure by creating its own high-pressure bubble inside the pot.
This artificial pressure raises the boiling point of water way past 212°F, which slashes cooking times. A pot of beans that takes hours on the stove can be perfectly tender in under an hour. It's the best kitchen hack I know for saving time and guaranteeing great results when you're cooking way up high.
Putting It All Together with Real Recipes
It’s one thing to talk about the science, but it’s another to see it in action. This is where you really start to build confidence. Let’s walk through the conversion process for two kitchen staples: a classic yellow cake and a hearty beef stew.
For both examples, we’ll pretend we're cooking at 5,000 feet—an altitude high enough to demand some real adjustments. Think of this as your hands-on workshop to see how all those principles we've discussed actually apply to real ingredients and cooking times.
Case Study: A Classic Yellow Cake at 5,000 Feet
A delicate yellow cake is the perfect guinea pig for high-altitude baking. Its structure is incredibly sensitive to air pressure, so a standard sea-level recipe will almost certainly collapse without some careful tweaks.
Here’s a look at a pretty typical ingredient list you’d find for sea level.
- Original Sea-Level Yellow Cake Ingredients
- 2 ½ cups all-purpose flour
- 2 ½ teaspoons baking powder
- ½ teaspoon salt
- 1 ½ cups granulated sugar
- ¾ cup unsalted butter, softened
- 3 large eggs
- 1 cup whole milk
- 1 teaspoon vanilla extract
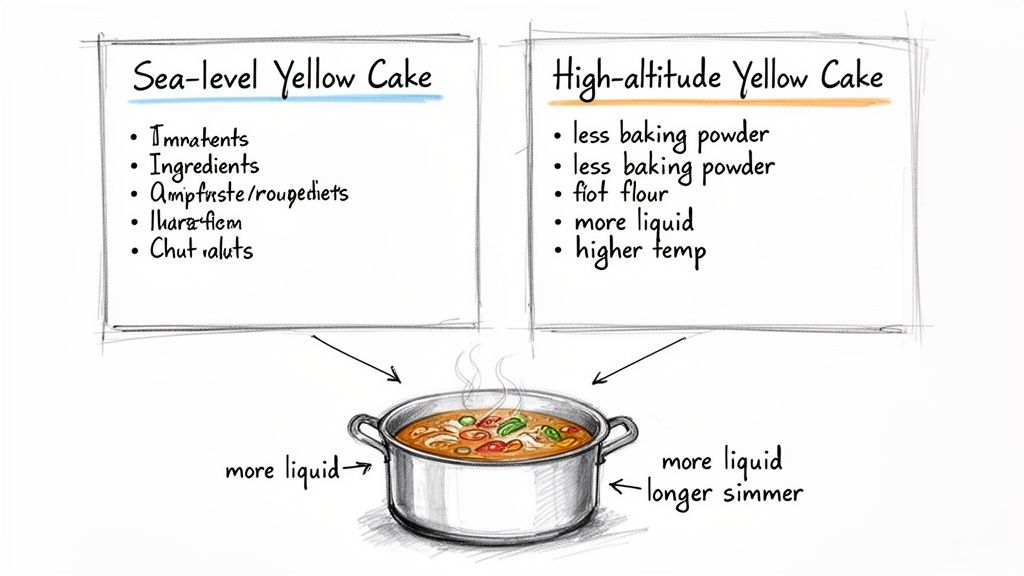
Now, let's apply our high-altitude rules to make this cake thrive. We need to cut back on the leavening and sugar while boosting the liquid, flour, and oven temperature.
- Adjusted High-Altitude Yellow Cake Ingredients (5,000 ft)
- Flour: Increase from 2 ½ cups to 2 ½ cups + 2 Tbsp. A little extra flour gives the cake the structure it needs to stand tall.
- Baking Powder: Decrease from 2 ½ tsp to 2 tsp. This prevents the batter from rising too fast and then collapsing.
- Salt: Remains ½ tsp.
- Sugar: Decrease from 1 ½ cups to 1 ¼ cups + 2 Tbsp. Less sugar helps strengthen the gluten network.
- Butter: Remains ¾ cup.
- Eggs: Remain 3 large eggs.
- Milk: Increase from 1 cup to 1 cup + 4 Tbsp. That extra liquid is crucial for fighting off the dry mountain air.
- Vanilla: Remains 1 tsp.
These small changes might look insignificant on paper, but they work together to create a completely different result. The reduced leavening slows down the rise, while the extra flour and less sugar give the cake the backbone it needs to hold its shape.
The baking instructions need an update, too.
- Original Oven Temp: 350°F
- Adjusted Oven Temp: 375°F (a solid 25°F increase)
- Original Bake Time: 30-35 minutes
- Adjusted Bake Time: Start checking around 22-25 minutes. That hotter oven sets the cake’s structure much more quickly.
If you’re tired of scribbling adjustments in the margins of your cookbooks, remember you can save these tweaked versions right in Recipe One. And if you ever need a quick refresher on cups versus grams, our guide on how to convert recipe measurements is a huge help.
Case Study: A Hearty Beef Stew at 5,000 Feet
Next, let's tackle a stovetop classic. With beef stew, the enemies are a lower boiling point and faster evaporation. If you just follow a sea-level recipe, you’re likely to end up with tough meat and crunchy vegetables.
Here’s a simple set of instructions you'd use at sea level.
- Original Sea-Level Beef Stew Instructions
- Sear 2 lbs of beef chuck in a Dutch oven.
- Sauté onions, carrots, and celery.
- Add 4 cups of beef broth, 1 cup of red wine, and seasonings.
- Bring to a boil, then reduce to a simmer.
- Cover and simmer for 2 hours, adding potatoes during the last 45 minutes.
At 5,000 feet, water boils at about 203°F, not the familiar 212°F. That lower simmering temperature means everything simply needs more time to get tender.
- Adjusted High-Altitude Beef Stew Instructions (5,000 ft)
- Your prep work—the searing and sautéing—stays exactly the same.
- Liquid Adjustment: Instead of 4 cups of beef broth, start with 4 ½ cups. That extra half-cup is your insurance against the faster evaporation that happens over a longer cook time.
- Simmer Time Adjustment: Once you bring the stew to a boil and lower the heat, settle in for a longer wait. Instead of 2 hours, you'll probably need 2 hours and 30 minutes.
- Vegetable Timing: Add your potatoes during the last 60 minutes of cooking, not the last 45. They’ll need that extra time to become fully tender in the cooler liquid.
For stovetop cooking up high, the most important lesson is to trust texture, not the timer. The new times are a great starting point, but always cook until the beef is practically falling apart and the vegetables are soft. The extra liquid ensures your stew won’t burn or reduce to sludge during its extended time on the stove. These simple changes are what separate a tough, disappointing dinner from a perfectly comforting high-altitude stew.
Troubleshooting Common High Altitude Kitchen Problems
Even when you follow all the rules, some recipes just don't cooperate at high altitude. Don't throw in the towel—it happens to the best of us. This is your go-to guide for figuring out what went wrong and how to nail it next time.
Most high-altitude cooking issues boil down to a handful of common culprits. Once you learn to spot the signs, you can pinpoint the problem and know exactly what to tweak.
Why Did My Cake Sink in the Middle?
Ah, the classic sunken cake. It’s the most heartbreaking high-altitude baking fail. You watch it puff up perfectly in the oven, only for it to collapse into a dense, gummy mess as it cools. Sound familiar?
This almost always means your leavening agent went into overdrive. The gas from the baking soda or powder expanded too quickly, and the cake's structure couldn't set fast enough to hold all that air. Once it cooled, the whole thing just caved in.
The Fixes:
- Cut back the leavening a little more next time. If you already reduced it by 1/8 teaspoon, try a full 1/4 teaspoon reduction.
- Crank up the oven temperature by another 5-10°F. A hotter oven helps the cake set faster, giving it the strength to stay tall.
- Add a touch more flour. Just one or two extra tablespoons can provide enough gluten to build a stronger foundation.
Why Are My Cookies Spreading So Much?
If your cookies are melting into one giant, paper-thin crisp, you’ve got a couple of things working against you. High altitude makes cookie dough softer and more prone to spreading for a few reasons.
Lower air pressure and faster evaporation make the sugar and fat more concentrated, which weakens the dough. The result is a batter that liquifies and spreads out before the edges have a chance to set.
The goal is to get the right balance back between the structure-builders (flour, eggs) and the tenderizers (sugar, fat). A small tweak is often all it takes to stop your cookies from becoming one giant, pan-sized cracker.
Try these tricks for chewier, perfectly shaped cookies:
- Pull back on the sugar and fat. Reducing each by just a tablespoon can work wonders.
- Beef it up with more flour. An extra tablespoon or two will create a firmer dough that holds its shape.
- Chill your dough! Seriously, don't skip this. An hour in the fridge solidifies the fat, which dramatically slows down how fast the cookies spread in a hot oven.
Why Are My Boiled Foods Still Hard?
Now let's move from the oven to the stovetop. If you’ve ever boiled potatoes that stayed crunchy or simmered beans that never softened, the problem is your boiling point. At 5,000 feet, water boils at 203°F, a full nine degrees cooler than the sea-level 212°F.
You’re essentially cooking your food at a lower temperature than the recipe assumes, which means it needs way more time to get tender. Following a sea-level timer is a surefire way to end up with undercooked food.
The Solutions:
- Just cook it longer. There's no magic number, but a good starting point is to add about 25% more time for anything you boil or simmer.
- Add more liquid. A longer cook time means more evaporation. Start with about 10-15% extra liquid so your pot doesn't go dry.
- Embrace the pressure cooker. This is the ultimate high-altitude shortcut. It creates its own pressurized environment, forcing water to boil at a higher temperature and cooking food much faster.
Getting a handle on a proper simmer can also help you control your liquid levels and cooking times more effectively. You can learn more about what it means to simmer food in our detailed guide.
Common Questions About Cooking and Baking Up High
Even when you've got the basics down, high-altitude cooking can throw you a curveball. It's totally normal to have questions about how these rules apply to a new appliance or a specific recipe you're trying to tackle. I've gathered some of the most common questions I get right here.
This is your quick-reference guide for those moments when you're standing in the kitchen wondering, "What about...?" A fast, clear answer can be the difference between a kitchen triumph and a frustrating flop.
Do I Need to Adjust My Air Fryer for Altitude?
Good news! Air fryers are pretty forgiving when it comes to altitude. Because they work by blasting food with hot, circulated air, they aren't as sensitive to air pressure changes as a conventional oven.
That said, the dry mountain air can still pull moisture out of your food a little faster. You probably don't need to change the temperature setting, but keep an eye on things.
- Check sooner. Get in the habit of checking for doneness 3-5 minutes before the recipe says to.
- The batter's the boss. If you're baking something in the air fryer, like muffins or a small cake, you absolutely still need to adjust the batter. The cooking method might be different, but the chemistry of your ingredients hasn't changed.
At What Elevation Do I Need to Start Making Changes?
You can generally relax until you hit 3,000 feet. Below that, the difference in air pressure is so minor that most recipes will turn out just fine without any tweaks.
If you're in that 2,000 to 2,900-foot range and notice your cakes are consistently a tiny bit dry, you could try adding a tablespoon of extra liquid. But the full-blown adjustments—less leavening, more liquid, less sugar—really only become necessary once you cross that 3,000-foot mark.
Once you get above 3,000 feet, the lower boiling point of water and reduced air pressure gang up on your recipes. They just aren't written to handle those conditions without a little help.
What About Candy Making and Deep Frying?
This is where altitude really makes a difference. Both candy making and deep frying are all about controlling how water behaves at high heat, and that changes dramatically up here.
With candy, you boil a sugar syrup to concentrate it, which raises the temperature. At altitude, water boils at a lower temperature, so you'll hit your target candy stages (like soft-ball or hard-crack) at lower temperatures, too. The rule of thumb is to reduce the final temperature by about 2°F for every 1,000 feet you are above sea level.
Deep frying is a bit different. The oil temperature is what it is, but the moisture inside the food will turn to steam and escape much more violently at altitude. This can lead to more aggressive bubbling and splattering, and it might make the outside of your food brown much faster than the inside cooks. Just be ready to pull things out a little sooner than you normally would.
Tired of scribbling notes and adjustments on every recipe? The Recipe One app is the perfect place to save your perfected high-altitude versions. It captures any recipe from social media, text, or even a video and organizes it into a clean, easy-to-use format in your personal library. Stop guessing and start building your collection of reliable, altitude-proof recipes today at https://www.recipeone.app/.

