Cooking a thick steak is all about controlling the heat. It’s a two-part game: you have to gently warm the inside to that perfect, rosy pink before you blast the outside to create a deeply browned, flavorful crust. Get this sequence right, and you'll sidestep the all-too-common tragedy of a steak that's burnt on the outside and cold in the middle.
Why Thick Steaks Need a Different Game Plan
If you've ever thrown a beautiful two-inch ribeye onto a screaming-hot pan and hoped for the best, you probably know the disappointment I'm talking about. The outside chars to a crisp long before the center has a chance to warm up. That's because intense, direct heat just can't penetrate a thick cut of meat fast enough. A steak that's 1.5 inches or thicker demands a smarter strategy.
The real challenge is mastering heat, not just using more of it. Forget the single, high-heat blitz. Instead, we're going to use two distinct cooking phases. First, a gentle, low-and-slow stage brings the steak up to temperature evenly from edge to center. Only then do we follow up with a quick, aggressive sear for that glorious crust.
The Two Best Ways to Cook a Thick Steak
Let's break down the two most reliable methods for nailing that steakhouse-quality result right in your own kitchen. Once you get the hang of these, you'll be able to cook any thick steak with total confidence.
- The Reverse Sear: This is the modern, almost foolproof technique. You start by baking the steak in a low-temperature oven until it's just shy of your target doneness. Then, you finish it with a quick sear in a hot pan. It gives you incredible control and an amazingly even color throughout.
- The Classic Sear-and-Roast: Think of this as the traditional restaurant method. You get that crust first by searing the steak in a blazing-hot, oven-safe skillet. Once it's beautifully browned, the entire pan goes into the oven to finish cooking gently.
Both approaches work beautifully, but they manage heat and timing differently. For the classic method, for instance, you'll need an oil with a high smoke point to handle that initial sear without filling your kitchen with smoke. You can check out this cooking oil smoke point chart to find the right one for the job.
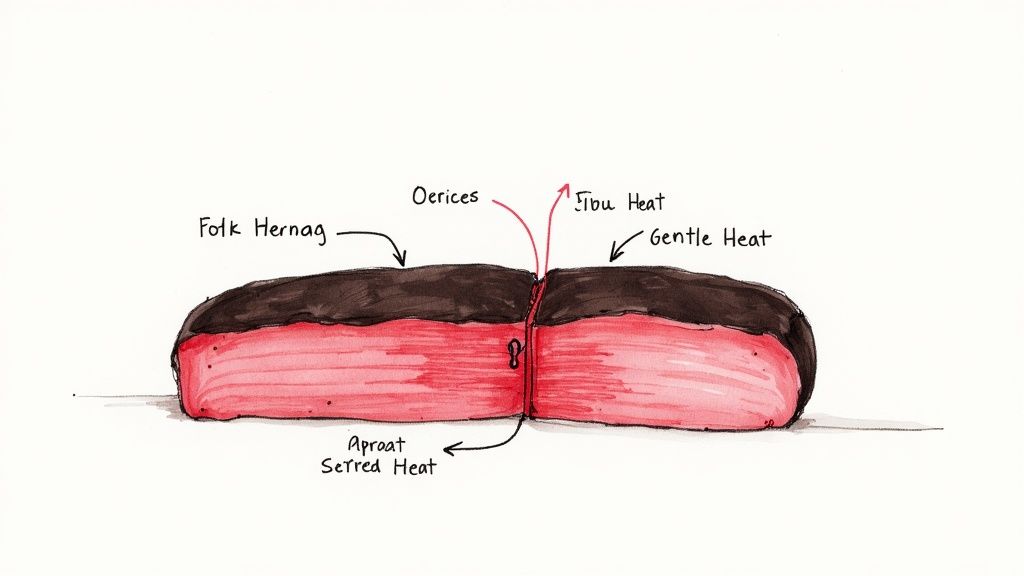
The ultimate goal is to eliminate the "gray band." That's the overcooked ring of meat you often see just beneath the crust. Both the reverse sear and the classic sear-and-roast are designed to shrink that band as much as possible, giving you more of that perfect edge-to-edge pink interior.
Thick Steak Cooking At A Glance
Here is a quick summary of the key variables for successfully cooking thick-cut steaks, comparing the two primary methods.
Variable
Classic Method (Sear-First)
Modern Method (Reverse Sear)
First Step
High-heat sear in a pan
Low-heat bake in the oven
Second Step
Finish in a moderate oven
High-heat sear in a pan
Best For
Chefs comfortable with pan-searing; slightly faster overall
Beginners; anyone seeking maximum temperature control
Crust
Deeply browned and robust
Excellent, but requires a very dry surface
Evenness
Very good, with a minimal gray band
Exceptional edge-to-edge color
This table helps illustrate how each method gets you to the same delicious destination, just via a different route.
It's no surprise that this style of cooking is gaining fans. Consumer demand for thick-cut steaks has jumped by about 15% over the last decade. People are catching on that a thicker cut often means a juicier, more flavorful steak. It's less about a bigger portion and more about getting a better cooking result.
Finding and Prepping the Perfect Thick-Cut Steak
A truly great steak experience doesn't start with a hot pan. It starts at the butcher counter. When you're tackling a thick steak, getting the right cut is more than half the battle. Not every steak can handle a two-inch thickness, but a few classic choices are practically built for it.
You're looking for cuts with serious marbling—that beautiful web of fat running through the meat. This is what melts as it cooks, basically basting the steak from the inside out and keeping it juicy. It’s why a thick-cut Ribeye is a go-to for so many people. A big Porterhouse or T-bone is another brilliant option, giving you that tender filet and a beefy strip steak all in one. And you can never go wrong with a substantial New York Strip for its pure, beefy flavor and great texture.
What to Look For at the Butcher Counter
Use your eyes—they’re your best tool here. The meat should be a nice, vibrant red, not dull or brownish. The fat should look creamy and white, a sure sign of freshness. Most importantly, you want to see that marbling distributed evenly throughout the steak, not just in a few big, isolated clumps.
A top-quality thick steak will feel firm and cold when you touch it. That density points to a solid muscle structure, which always cooks up into a better-textured steak.
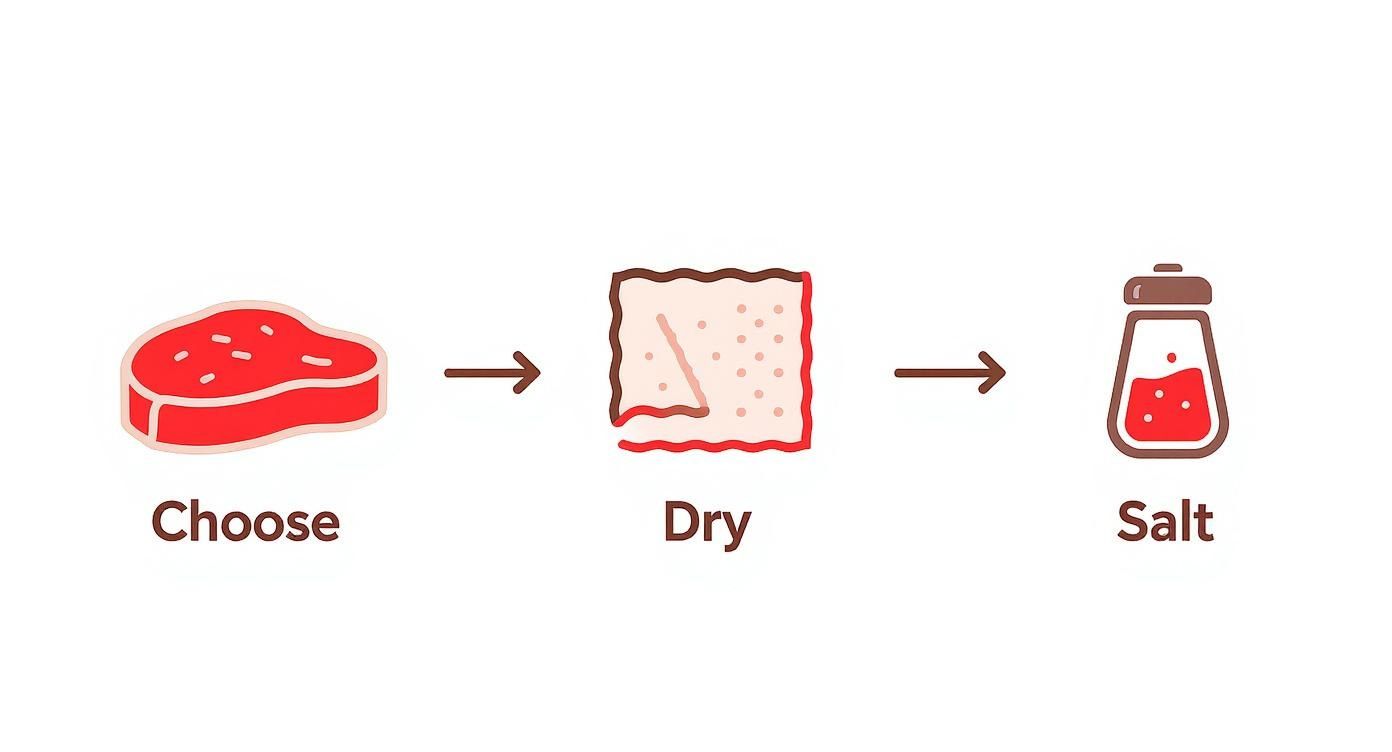
The Two Prep Steps You Can't Skip
Once you've brought that beautiful steak home, there are two things you absolutely must do to guarantee a perfect crust. First, get the surface bone-dry. Moisture is the number one enemy of a good sear. If the steak is wet, the heat will just steam it instead of creating that gorgeous, brown crust. So, grab some paper towels and pat it dry on every single side right before you season.
Second, you've got to season it right. This is where your timing really matters.
To Salt Now or Later?
You have two solid options for salting, and it all depends on how much time you have.
- The Overnight Dry-Brine: This is the pro move if you can plan ahead. Coat the steak generously with coarse salt and let it sit on a wire rack, uncovered, in the fridge overnight. At first, the salt pulls moisture out, but then it dissolves and gets reabsorbed back into the meat. This seasons the steak deeply and makes the surface even drier for a killer sear.
- The Right-Before-You-Cook Method: In a hurry? No problem. Just salt your steak liberally on all sides immediately before it goes into the pan. The one thing to avoid is salting it and letting it sit for 30 or 40 minutes. That’s the worst-case scenario where moisture has been pulled to the surface but hasn't had time to go back in, which will sabotage your sear.
Speaking of timing, if you've ever dealt with frozen meat, you know that proper thawing is key to getting the texture right. While we're talking about fresh steaks today, knowing how to thaw meat gently is a fundamental kitchen skill. For other meals, you can check out our guide on how long to thaw a frozen chicken to make sure you're always starting with the best possible ingredients.
The love for high-quality meat is a global thing, and it's made these amazing cuts easier to find than ever. Just look at Japan's Wagyu market, which was valued at over $1.2 billion in 2022. Thick-cut steaks accounted for almost 40% of those sales. This just goes to show that people everywhere appreciate the incredible eating experience that only a perfectly cooked thick steak can deliver. You can explore more about the global meat market trends on oecd.org.
Get Perfect Thick-Cut Steaks With The Reverse Sear
If you've ever felt a bit of pressure cooking a beautiful, thick-cut steak, the reverse sear method is about to become your best friend. It’s a total game-changer that flips the traditional steak-cooking process on its head, giving you incredible control and steakhouse-quality results right in your own kitchen. The idea is simple: instead of searing first and hoping the inside cooks properly, you gently cook the steak from the inside out.
It all starts in a low-temperature oven, right around 250°F (120°C). This slow, gentle heat lets the steak’s internal temperature climb gradually and evenly. By doing this, you practically eliminate that dreaded "gray band"—the overcooked, tough ring of meat you often see just under the crust. What you get instead is a perfect, edge-to-edge rosy pink interior. If you need a hand with different oven settings, our oven temperature conversion table can be a real help.
For this first stage, precision is key. You'll want to place your seasoned, dry steak on a wire rack set inside a baking sheet. This little trick is crucial because it allows hot air to circulate all around the steak, making sure it cooks evenly on every single side. An instant-read meat thermometer isn't just a nice-to-have here; it’s absolutely essential for nailing it.
As you can see, every step—from choosing the right cut to getting the salt just right—plays a big part in building the final texture and that amazing crust.
The Low and Slow Bake
In the oven, your goal is to sneak the steak’s internal temperature up to about 10-15°F below your final target. We leave this buffer because the temperature will continue to rise during that final, high-heat sear.
When I'm cooking, I rely on my thermometer completely. You're flying blind without it.
- For a Rare finish, I pull the steak from the oven when it hits 90-95°F (32-35°C).
- For Medium-Rare, I'm looking for 110-115°F (43-46°C) before I take it out.
- For Medium, the target is 120-125°F (49-52°C).
This method has become wildly popular for a reason—it’s nearly foolproof. It’s no surprise that over 45% of home cooks now say they prefer the reverse sear for thick steaks. It works especially well for any cut over 1.5 inches thick, delivering that perfect crust and consistent doneness time and time again.
Once your steak hits that magic number, pull it from the oven. It won’t look like much just yet, but trust me, the magic is about to happen. Now's the time to get your pan screaming hot for the final step.
A Pro Tip From My Kitchen: Don't rush straight to the sear. Let your steak hang out for a few minutes while you preheat your pan. This quick rest helps redistribute some of the juices before the final blast of heat, making for an even juicier bite.
Internal Temperature Guide for Thick Steaks
The key to a perfect reverse sear is knowing exactly when to pull your steak from the low-heat oven. This table outlines the target temperatures you should aim for before the final sear. Remember, the internal temp will climb another 10-15°F in the hot pan.
Final Desired Doneness
Pull from Low Heat At
Final Target Temperature
Rare
90-95°F (32-35°C)
125°F (52°C)
Medium-Rare
110-115°F (43-46°C)
135°F (57°C)
Medium
120-125°F (49-52°C)
145°F (63°C)
Medium-Well
130-135°F (54-57°C)
155°F (68°C)
Using these pull temperatures as your guide will help you consistently hit your desired level of doneness every single time.
The Final, Blazing-Hot Sear
Alright, this is where you build that incredible, deep-brown crust that makes a steak truly special. Get a cast-iron skillet on the stove over high heat and let it get hot—I mean, really hot, until it's just about to smoke. Add a tablespoon of a high-smoke-point fat, like avocado oil or ghee, which won't burn under the intense heat.
Now, carefully lay that steak in the pan. You're listening for an immediate, loud, aggressive sizzle. That’s the sound of a perfect crust forming. You only need 60 to 90 seconds per side; you’re just creating the crust, not cooking the steak further. Don't forget to grab your tongs and sear the thick edges of the steak, too!
As soon as it's done, get that steak out of the pan and onto a cutting board. It's now ready for that crucial final rest before you slice in and enjoy.
Using the Classic Pan Sear and Oven Finish
While the reverse sear gives you amazing control, the classic pan-sear-to-oven-finish method is the faster, more traditional way you’ll find in most restaurant kitchens. It's all about creating a deeply flavorful, robust crust by starting with intense, direct heat. If you love that signature steakhouse sizzle from the moment the steak hits the pan, this is the technique for you.
The undisputed champion for this job is a heavy cast-iron skillet. Nothing holds and distributes heat quite like it, which is the key to creating that magnificent crust. Of course, a poorly maintained skillet can cause sticking and a spotty sear. Knowing how to season cast iron skillets is a foundational skill that pays dividends every time you cook.
Kicking Off with the Perfect Sear
First thing's first: get your oven preheating to 400°F (200°C). As that’s coming up to temp, set your cast-iron pan on the stovetop over high heat. You want it screaming hot. A tiny wisp of smoke is your signal that it's ready for action.
Add a tablespoon of an oil with a high smoke point, like avocado or grapeseed oil. Now, carefully lay your bone-dry, seasoned steak right in the center of that skillet. That immediate, loud sizzle is the sound you're listening for—it means a great crust is forming. Let it sear for 2-3 minutes per side without poking or prodding it. Just let it be.
A common rookie mistake is only searing the top and bottom. Grab your tongs and hold that steak on its side, searing the thick edges for about 30-45 seconds each. This simple step ensures every single surface gets that amazing flavor and texture.
The Oven Finish for Even Cooking
Once every side is beautifully browned, the oven is ready to take over. This is also the perfect moment to build another layer of flavor. Tossing in a few smashed garlic cloves, a sprig of fresh rosemary, and a knob of butter right before it goes into the oven is a classic steakhouse trick.
As the butter melts and foams, quickly spoon it over the steak a couple of times. Then, slide the entire oven-safe skillet into your preheated oven. This crucial step allows the steak's interior to come up to temperature gently, all without burning that beautiful crust you just worked to create.
How long it stays in the oven depends on the steak's thickness and your final goal, but you're typically looking at somewhere between 5 and 10 minutes.
Nailing Your Final Temperature
With this method, your meat thermometer is your best friend. The initial sear gives the internal temperature a big head start, so the cooking process can accelerate quickly once it's in the oven.
Start checking the temperature after the first five minutes.
- For medium-rare: Pull the steak when your thermometer reads 130°F (54°C).
- For medium: You're looking for 140°F (60°C).
Don't forget that the internal temperature will continue to climb by a few degrees as the steak rests. The biggest mistake you can make here is searing for too long at the beginning. That will create a thick, unappealing gray band of overcooked meat just beneath the crust. Keep the sear fast and hot, then trust the oven to do the rest.
The Final Steps: Resting, Slicing, and Serving
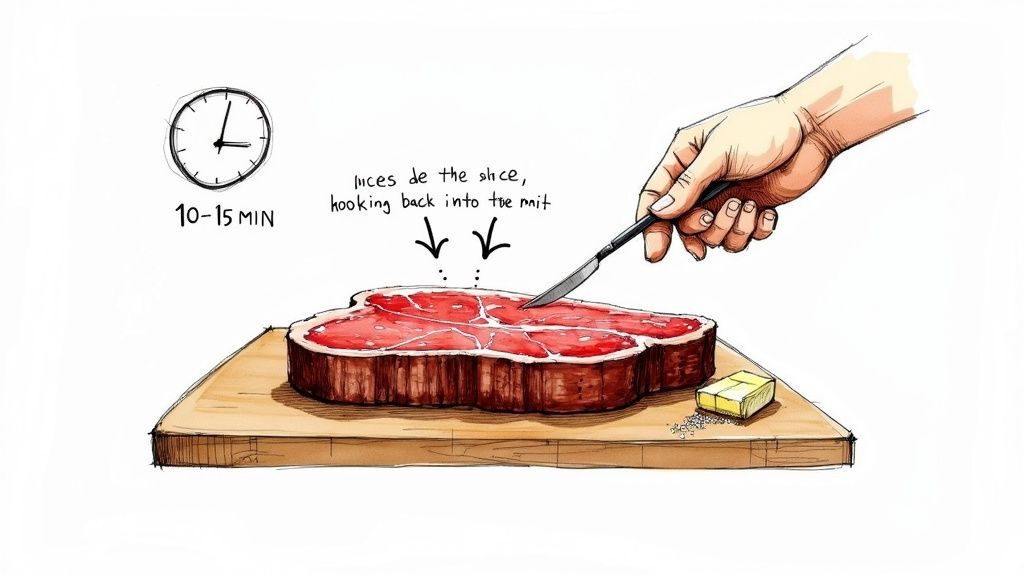
You've navigated the heat, you've nailed the temperature, and that crust looks absolutely perfect. But believe it or not, the final few minutes after your steak leaves the pan are just as important as the cooking itself. Resisting the urge to slice into it right away is the ultimate test of patience, and it makes all the difference in the world.
Think about what happens when you cook a steak. The intense heat causes the muscle fibers to tighten up, pushing all the delicious juices toward the cooler center of the meat. If you slice into it immediately, those juices will pour out onto your cutting board, leaving you with a dry, disappointing steak. This is where the magic of resting comes in.
Let It Rest
Letting your steak rest gives those tensed-up muscle fibers a chance to relax. As they do, they reabsorb all that flavorful moisture, allowing it to redistribute evenly throughout the entire cut. The result? Every single bite is as juicy and succulent as the next.
So, how long is long enough?
- For a thick-cut steak around 1.5 to 2 inches, a 10-minute rest is your golden rule.
- If you're tackling something massive, like a big tomahawk, don't be afraid to push that rest time to 15 minutes.
Just tent the steak loosely with a bit of foil. This keeps it warm without trapping steam, which would ruin that beautiful crust you worked so hard to create.
Worried about your steak getting cold? Don't be. During the first few minutes of resting, carryover cooking actually causes the internal temperature to continue rising by another 5 to 10 degrees. This final, gentle cooking phase is what truly perfects the doneness.
The Art of the Slice
Once your steak has had its much-needed rest, it’s time to slice. How you slice it has a huge impact on the final texture and tenderness. The most important rule to remember is to always slice against the grain.
Take a close look at your steak. You’ll see the muscle fibers all running in one direction—that’s the grain. By cutting perpendicular to those fibers, you are effectively shortening them. This makes each piece incredibly tender and easy to chew. If you slice with the grain, you end up with long, stringy, and much chewier pieces of meat.
A few finishing touches can take your steak from great to truly unforgettable. A final sprinkle of flaky sea salt adds a fantastic crunch and a last little pop of flavor. For a touch of pure decadence, you can place a pat of compound butter on the warm slices and just let it melt over the top, creating its own savory sauce. Serving a perfectly rested and sliced steak is the final, rewarding step in mastering the art of cooking thick steaks.
Common Questions About Cooking Thick Steaks
Even with a solid game plan, a few questions always pop up when you're staring down a beautiful, thick-cut steak. It's totally normal. Let's tackle some of the most common hurdles so you can cook with total confidence.
Should I Let My Steak Reach Room Temperature Before Cooking?
This is probably one of the biggest myths in the steak world, and honestly, the science just doesn't back it up. A massive, two-inch-thick steak would need to sit out for a couple of hours to actually reach room temperature, which is a food safety gamble you just don't want to take.
Pulling your steak out for 30-60 minutes before cooking will only raise its internal temperature by a handful of degrees. It's not enough to make any real difference in cooking time. The step that truly matters? Making sure the surface of that steak is bone-dry. Patting it down with paper towels right before it hits the heat is the secret weapon for getting a perfect, crackling crust.
What Is the Best Pan for Searing a Thick Steak?
For an amazing sear, nothing beats a pan that holds onto heat like a champ. That’s why a cast-iron skillet is the undisputed king. Its heavy, dense build means it stays screaming hot even after you lay that cold steak down, which is exactly what you need for a deep, even, mahogany crust.
Here’s a quick rundown of your best pan options:
- Cast Iron: The gold standard for heat retention. Can't go wrong here.
- Carbon Steel: A fantastic alternative. It's a bit lighter and heats up faster.
- Stainless Steel: It gets the job done, but it’s more likely to have hot spots that can lead to an uneven sear.
- Non-Stick Pans: Absolutely avoid them. The high temperatures required for searing can wreck the non-stick coating and release nasty fumes.
Can I Cook a Thick Steak Without a Meat Thermometer?
I know it's tempting to try the old "poke test," but for a thick steak, it's a surefire way to end up with a disappointing result. With a thick cut, the temperature can vary wildly from the edge to the deep center. You might have a steak that feels medium-rare on the surface but is still totally raw in the middle.
An instant-read digital thermometer is your best friend. It takes all the guesswork out of the equation and is the one tool that will guarantee you nail that perfect temperature every single time. It's the difference between being a good cook and a great one.
Getting to know your ingredients is part of the fun, too. If you're curious about the nutritional breakdown of your meal, a recipe calorie calculator can give you some great insights. At the end of the day, having the right tools and the right knowledge is what will get you that perfectly cooked steak you’ve been dreaming of.

