A good recipe is more than just a list of ingredients and some directions. It’s a roadmap, a story, and a promise of a delicious meal. When you write a recipe, you’re not just sharing instructions; you're giving someone the confidence to create something wonderful in their own kitchen. The key is to structure it in a way that’s clear, reliable, and genuinely helpful.
The Blueprint for a Perfect Recipe
So, what makes a recipe truly great? It’s not some hidden secret. It’s the perfect blend of clear writing and a reliable method. A great recipe feels like having an experienced friend right there with you, guiding you every step of the way. It turns what could be an intimidating process into something fun and totally achievable.
This crystal-clear format we’re all used to is actually a pretty new thing. For hundreds of years, recipes were just loose, narrative paragraphs. They assumed you already knew your way around a kitchen. It wasn't until the 19th century that things started to change. Between 1800 and 1900, the ingredient-method format we know and love went from being virtually nonexistent to making up over 90% of recipes in Western cookbooks. By 1920, it was the gold standard.
Essential Components of a Modern Recipe
These days, anyone following a recipe expects a certain level of detail. The best ones nail this by mixing a bit of personality with dead-on precision. If you’re just starting, getting a handle on the standard recipe format is the first, most important step.
To get you started, here's a quick look at the core elements every modern recipe needs. These components work together to make your instructions foolproof and enjoyable to follow.
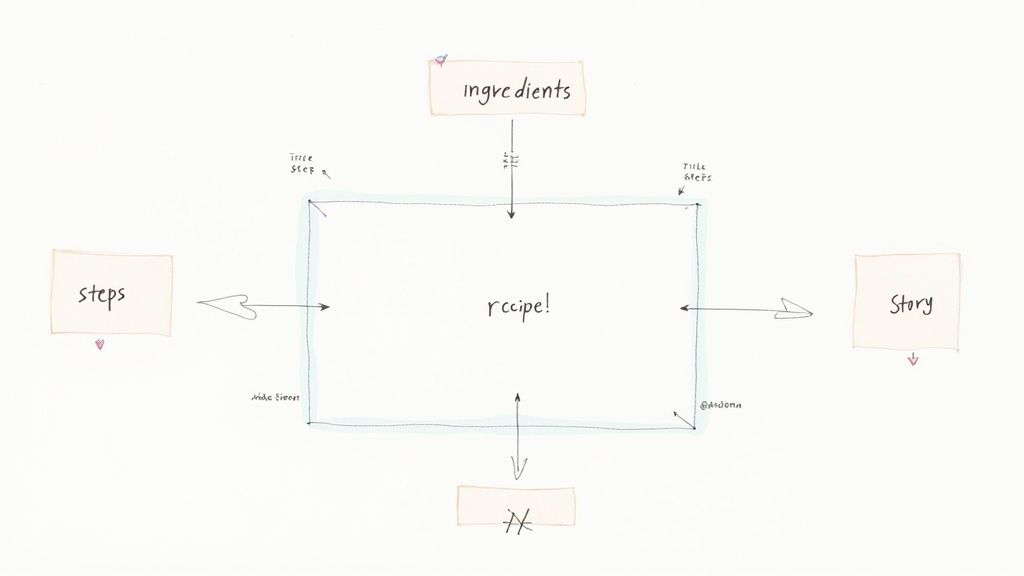
Core Elements of a Modern Recipe
Component
Purpose
Engaging Title
This is your first impression. It should be descriptive, appetizing, and easy to find with a quick search.
Personal Introduction
Connect with your reader. Share a quick story, a useful tip, or what makes this dish special to you.
Precise Ingredient List
This is all about clarity. List ingredients in the order they’re used, with exact, consistent measurements.
Action-Oriented Steps
Keep your instructions simple and direct. Start each step with a strong verb like "Chop," "Sauté," or "Whisk."
Helpful Notes/Tips
Offer substitution ideas, storage advice, or techniques for getting the best results.
Ultimately, a well-written recipe builds trust and gives home cooks the confidence they need to succeed in the kitchen.
Here’s a breakdown of those non-negotiable elements:
- A Catchy Title: Your title is your hook. Make it descriptive enough that people know what it is, but enticing enough to make them click.
- A Personal Intro: This is where you connect. Tell a short story about the recipe, offer a key tip, or just explain why you love it so much.
- A Spot-On Ingredient List: This prevents kitchen disasters. Always list ingredients in the order they appear in the instructions, and use exact measurements.
- Clear, Actionable Instructions: Keep your steps simple and easy to digest. Start each one with a command verb—think "Mix," "Bake," or "Fold."
The goal is to remove every bit of guesswork. A cook should feel completely confident from the moment they start prepping to the final garnish. That precision is what builds trust and keeps people coming back for more.
Of course, great recipe writing goes beyond just the nuts and bolts. It’s about writing engaging content that pulls people in and makes them excited to get cooking. When you master that, you're not just sharing a recipe; you're empowering people to create their own delicious memories.
Writing a Title and Intro That Sizzles
Before anyone even thinks about grabbing a mixing bowl, they're reading your title and intro. These two pieces are your hook. They're what make someone stop scrolling through endless search results and decide, "Okay, this is what I'm making for dinner." Your title is the first handshake—it needs to sound delicious and be easy to find.
Think about it like this: "Chicken Dinner" is a sign on a blank building. It’s vague and forgettable. But "Easy 20-Minute Lemon Herb Roast Chicken"? That tells a whole story. It promises a quick, simple meal with a bright, savory flavor. That’s the kind of title that gets clicks and gets cooked.
Crafting a Compelling Recipe Title
The best titles marry enticing descriptions with a clear benefit. You're trying to paint a picture in your reader's mind while also answering the practical questions they're typing into Google, like "what's a quick weeknight meal?" or "best chocolate dessert recipe."
Here are a few ways I’ve found to create titles that really work:
- Lean on sensory words. Think "Fudgy," "Creamy," "Crispy," or "Zesty." You want to trigger a craving. "Fudgy Triple Chocolate Brownies" just hits different than "Chocolate Brownies," doesn't it?
- Promise a solution. What problem does your recipe solve? Is it fast? Healthy? All made in one pot? A title like "One-Pan Mediterranean Salmon and Veggies" or "5-Ingredient Peanut Butter Cookies" has an immediate, built-in appeal.
- Get specific. Name the hero ingredient and the dish. Don't just post a "Pasta Recipe." Call it "Creamy Tuscan Sausage Pasta." It’s direct, it’s descriptive, and it sets clear expectations.
Getting the title right is your first real step toward writing recipes people will actually discover, make, and love.
Writing an Introduction That Connects
Once your killer title has reeled them in, the intro is where you build a real connection. This is more than just a few sentences of filler text; it’s your chance to turn a dry list of instructions into an experience. Keep it brief, give it some personality, and get people excited to cook.
A great recipe intro feels like a friend sharing a story about their favorite meal. It's the little narrative that gives the food meaning and transforms a simple dish into a potential memory.
Don't just state that the dish is tasty—show them. Tell a quick story about how it's your grandmother’s go-to recipe for Sunday dinner. Maybe offer a game-changing tip that you discovered after making it a dozen times, like the secret to getting perfectly crispy chicken skin. Explain why this is the only lasagna recipe they’ll ever need. This short, personal touch builds trust and gets your reader invested before the oven is even preheated.
Mastering the Art of the Ingredient List
If the recipe title hooks your reader, the ingredient list is what keeps them on the line. It's the absolute foundation of the dish. Get this part wrong—make it confusing or vague—and you're setting your reader up for a kitchen disaster before they even preheat the oven. Your mission here is to be crystal clear and leave zero room for interpretation.
This obsession with precision is actually a pretty modern thing. For hundreds of years, recipes were maddeningly vague, calling for "a handful of this" or "some of that." It wasn't until the home economics movement in the late 19th century that folks like Fannie Farmer started pushing for a more scientific, reproducible approach. You can read more about this fascinating shift in recipe writing history. Today, that same scientific mindset is what gives home cooks the confidence to try something new.
Listing Ingredients with Precision
Here's the golden rule: list every single ingredient in the exact order it appears in the instructions. It sounds simple, but it creates a natural workflow for the cook. They can gather and prep as they go, without having to scan up and down the page. It’s a small detail that makes a world of difference.
Then there's the matter of measurements. Be specific and, more importantly, be consistent. If you're using both tablespoons and teaspoons, write them out fully as "1 tablespoon" and "1 teaspoon" instead of abbreviating. This simple habit clears up any potential confusion, especially for someone just starting out in the kitchen.
Precision also means being specific about preparation. Pay close attention to your phrasing, because it really matters. For instance, there's a huge difference between these two instructions:
- 1 cup flour, sifted: This tells the cook to measure one cup of flour first, and then sift it.
- 1 cup sifted flour: This means you sift the flour before you measure it into the cup.
That second method gives you a much lighter, less-dense cup of flour. Mixing them up can completely throw off a delicate cake or pastry. So, a good rule of thumb is to place the prep instruction after the ingredient if the action happens after measuring.
Grouping for Clarity and Accessibility
For more involved recipes—think a layered lasagna or a cheesecake with a separate crust, filling, and topping—grouping ingredients under subheadings is a lifesaver. Using clear labels like "For the Crust" or "For the Filling" breaks the recipe down into manageable mini-projects.
Think of each subgroup as its own little recipe. This simple organization makes the whole process feel less overwhelming and helps the cook focus on getting each component right before putting it all together.
Finally, a little thoughtfulness goes a long way. Consider your audience and offer smart substitutions where you can. A quick note like "(or 1 cup of gluten-free all-purpose flour)" instantly makes your recipe more accessible.
The same applies to measurements. While cups are standard in the U.S., many bakers around the world—and plenty of serious home bakers here—swear by the accuracy of weights. Including measurements in both cups and grams is a fantastic touch. You can even point your readers to a helpful resource like this cups-to-grams converter to make their lives even easier.
Crafting Instructions Your Readers Can Trust
This is where your recipe truly comes to life. If the ingredients are the "what," the instructions are the "how"—the direct line between your reader and a fantastic meal. Think of it this way: the ingredient list is the blueprint, but your instructions are the skilled builder bringing it all together. The goal is to make every step logical, concise, and practically impossible to get wrong.
The best way to build that trust is to start each instruction with a strong, clear action verb. Words like "Sauté," "Whisk," "Fold," or "Bake" immediately tell the cook what to do. There's no room for confusion; it puts them in control and gets things moving.
Breaking Down Complex Techniques
Even a simple-sounding recipe can have a tricky part. The secret is to break down any complex process into small, easy-to-follow tasks. Instead of one vague step like "Make the caramel," you need to hold their hand a bit.
Walk them through it piece by piece:
- Combine the sugar and water in a medium saucepan.
- Cook over medium heat, stirring gently, until the sugar dissolves.
- Increase the heat and bring the mixture to a boil, but stop stirring.
- Boil until the caramel turns a deep amber color, which should take about 5-7 minutes.
This approach keeps your reader from feeling overwhelmed. Each small success builds their confidence in you and your recipe. It's a lot like storytelling; if you're interested in that, you might find some useful parallels in learning how to write a captivating video script.
To illustrate just how important clear language is, here’s a quick comparison of what to do and what to avoid.
Instruction Writing Do's and Don'ts
| Instead of This (Vague) | Do This (Clear & Actionable) |
|---|---|
| Cook the onions. | Sauté the onions over medium heat for 5-7 minutes, until soft and translucent. |
| Add flour and stir. | Whisk in the flour and cook for 1 minute until it smells nutty. |
| Mix until combined. | Fold the wet ingredients into the dry ingredients with a spatula until just combined. Be careful not to overmix. |
| Bake the cake. | Bake at 350°F (175°C) for 30-35 minutes, or until a toothpick inserted into the center comes out clean. |
As you can see, the clearer instructions provide specific actions, times, and sensory cues that remove all guesswork.
Painting a Picture with Sensory Cues
The best instructions don’t just tell; they show. Your reader can't see, smell, or taste what's happening in your kitchen, so you need to be their senses. This is where you can add those little details that make a huge difference.
Don’t just write "cook for 5 minutes." Instead, try "cook for 5 minutes, or until the onions are soft, translucent, and fragrant." This gives the cook a clear target, which is far more helpful than just a number on a timer.
These cues empower people to use their own judgment, which is crucial since every stove, oven, and even ingredient can be a little different. Describe what they should see, smell, or even hear. Phrases like "simmer until the sauce is thick enough to coat the back of a spoon" or "sear the steak until a deep brown crust forms" are invaluable.
Specifying the Details That Matter
Finally, get specific. Ambiguity is the enemy of a good recipe because it leads to inconsistent results. Be explicit about the little things that can make or break a dish.
This means specifying pan sizes (e.g., "use a 9x13-inch baking dish"), exact temperatures, and necessary resting times. Temperature is especially critical, as ovens can vary wildly. If you have an international audience, providing conversions is a game-changer. You can always point them to a helpful oven temperature conversion table to make things easier.
By providing these specifics, you're not just sharing a recipe—you're giving your reader the confidence to nail it every single time.
Adding Details That Make a Difference
A great recipe is more than just a list of ingredients and a set of instructions. It’s a conversation with the cook, anticipating their questions and guiding them past potential pitfalls. These little details are what elevate a recipe from good to truly great, turning a potentially frustrating experience into a kitchen success story.
This all starts with the basics: prep time, cook time, and total time. And be honest about it! Time yourself when you make the dish, and maybe even add a few extra minutes for wiggle room. Nothing is more frustrating for a home cook than a "30-minute meal" that actually takes an hour.
The same goes for the recipe yield. Is it "four servings" or "one 9x13 pan"? Being specific prevents someone from accidentally making way too much food for a quiet dinner or, even worse, not nearly enough for their dinner party.
Providing Helpful Recipe Notes
Your "Recipe Notes" section is where the real magic happens. This is your chance to share all the wisdom that doesn't neatly fit into the step-by-step directions but is absolutely crucial for getting the dish just right. It’s where your expertise truly shines.
Think about what might trip someone up and head it off at the pass.
- Troubleshooting Tips: Offer a quick fix for a common problem. For example, "If your batter seems a little thin, don't panic! Just let it rest in the fridge for 15 minutes to thicken up." A simple sentence like that can be a lifesaver.
- Storage Instructions: Don't leave people guessing what to do with leftovers. Be clear: "Store in an airtight container in the refrigerator for up to 3 days."
- Ingredient Substitutions: Make your recipe more accessible by suggesting easy swaps. Can they use maple syrup instead of honey? Is there a good nut-free alternative? Let them know.
- Technique Pointers: Share a pro-tip that makes a real difference. This could be anything from the secret to getting super-crispy chicken skin to a recommendation on which oil to use for high-heat searing—something you can learn more about with a good cooking oil smoke point chart.
Think of the notes section as your way of cooking alongside them. It’s the part of the recipe that says, "I've been there, I know what can go wrong, and I've got your back."
The Power of Visuals and Nutrition Facts
Never underestimate the impact of a good photo. A beautiful picture of the final dish isn't just eye candy; it's a visual promise of what's to come, giving the cook a clear goal to work toward. Even better, include photos of any particularly tricky steps to guide them through the process.
And while you don't always need it, adding basic nutritional information can be a huge help. A simple breakdown of calories, protein, and carbs allows people to see how your delicious meal fits into their lifestyle. These finishing touches are what make your recipe a complete, trustworthy resource someone will return to again and again.
Common Questions About Recipe Writing
Even with a good handle on the basics, you're bound to hit a few snags when you start writing your own recipes. Let's walk through some of the questions that come up all the time, from dealing with ingredient swaps to the ethics of riffing on someone else's creation. Nailing these details is what separates a good recipe from a great one.
Is It Okay to Adapt Someone Else’s Recipe?
This is a big one. You find a recipe you absolutely love, and you want to share your own spin on it. Can you? The short answer is yes, but it’s a little more nuanced than that.
A simple list of ingredients isn't protected by copyright. However, the creative expression—the specific instructions, the descriptive text, the photos—absolutely is. To ethically adapt a recipe, you need to make it your own. We're talking about significant, meaningful changes, not just swapping out parsley for cilantro.
Here's what that looks like in practice:
- Rethink the Method: Maybe you discovered a shortcut or a technique that yields a better result. Describe that new process in your own words.
- Change Core Components: Did you convert a classic cookie to be gluten-free? Or maybe you turned a dairy-heavy sauce into a vegan masterpiece? That's a substantial change.
- Rewrite Everything: This is non-negotiable. Your instructions, your headnotes, and your photos must be 100% your own work.
Never, ever copy and paste someone else’s recipe. If your version is just a minor tweak, the right move is to simply link back to the original source and give them full credit for the inspiration.
How Should I Handle Substitutions?
Another common question is about offering substitutions. Should you include them? And how many is too many?
Smart, tested substitutions can be a lifesaver for your readers. It opens your recipe up to people with different dietary needs or those who just happen to be out of a specific ingredient.
The key is to avoid going overboard. If you list five different flour options and three different sweeteners, the original recipe gets completely lost in the noise. A good rule of thumb is to stick to one or two well-tested swaps for the most critical ingredients.
My Pro Tip: Always be upfront about what you've personally tested. A simple note like, "I’ve had great results using both almond milk and oat milk in this recipe," builds far more trust than a vague suggestion. It shows you’ve done the homework to ensure your reader has a good experience.
What About Scaling a Recipe Up or Down?
Finally, let's talk about scaling. It can be tempting to add a note saying your recipe can be easily doubled or halved, and sometimes, that’s perfectly fine. For a big pot of soup or a simple stew, a quick note like, "This recipe doubles well," is a helpful touch.
But for baking and other more precise recipes, it's not so simple. You can't just double a cake recipe and expect it to work perfectly. Baking times, pan sizes, and even leavening agents can all behave differently when scaled.
If you haven't personally tested a scaled version, it's best not to give specific instructions. Honesty is your best tool for building an audience that trusts you. When you focus on providing rock-solid, reliable recipes, people will keep coming back.
Once you’ve built up a collection of recipes you're proud of, you might even think about putting them all together. If that sounds interesting, you can find some great advice on how to create a cookbook for free to help you get started.

