Making fudge with peanut butter is surprisingly simple. You really only need a few pantry staples and don't have to worry about any special equipment. The whole process is about melting butter with a good, creamy peanut butter, then slowly mixing in powdered sugar until it all comes together into a thick, smooth batter. Pour it into a pan, let it chill until it's firm, and that's it. A perfect no-bake treat.
The Secret to Perfectly Creamy Peanut Butter Fudge
Ever had fudge that was gritty or just fell apart? Forget that. The secret to making impossibly creamy peanut butter fudge isn't some complicated technique—it's all about understanding how a few simple ingredients work together. This foolproof, no-bake recipe really only hinges on a couple of key components to get that perfect melt-in-your-mouth finish.
Why Your Ingredient Choices Matter
Let's break down what makes this recipe work so well. It’s less about what you do and more about what you use.
First off, you absolutely have to use a stabilized peanut butter like Jif or Skippy. I know many of us love natural peanut butter, but it tends to separate and will leave your fudge greasy and prevent it from setting up properly. Trust me on this one.
Second, powdered sugar is non-negotiable. Its super-fine texture dissolves completely, which is how you avoid the graininess that regular granulated sugar would leave behind.
It’s no wonder homemade peanut butter desserts are so popular. Back in 2019, U.S. peanut butter sales hit about $2.3 billion, which just shows how much we all love this stuff. Making fudge at home gives you total control over the quality and sweetness, which is a huge part of the appeal. You can learn more about the peanut butter market and its impact on home cooking trends.
Your Fudge Ingredients and Their Roles
Understanding what each component does is the first step to a perfect batch.
| Ingredient | Its Job in the Recipe |
|---|---|
| Creamy Peanut Butter | Provides the primary flavor and rich, fatty base for the fudge. |
| Butter | Adds creaminess, moisture, and helps the fudge set to a firm-yet-soft texture. |
| Powdered Sugar | Sweetens the fudge and dissolves completely, ensuring a smooth, non-gritty finish. |
| Vanilla Extract | Enhances the other flavors, adding a subtle warmth and depth. |
Each ingredient plays its part, so sticking to the list is your best bet for success.
Key Takeaway: The foundation of great fudge is simple: Use a commercial-brand creamy peanut butter and powdered sugar. This combination is your ticket to a smooth, consistent texture every single time and sets you up for fudge-making success from the get-go.
Getting Your Ingredients and Tools Ready
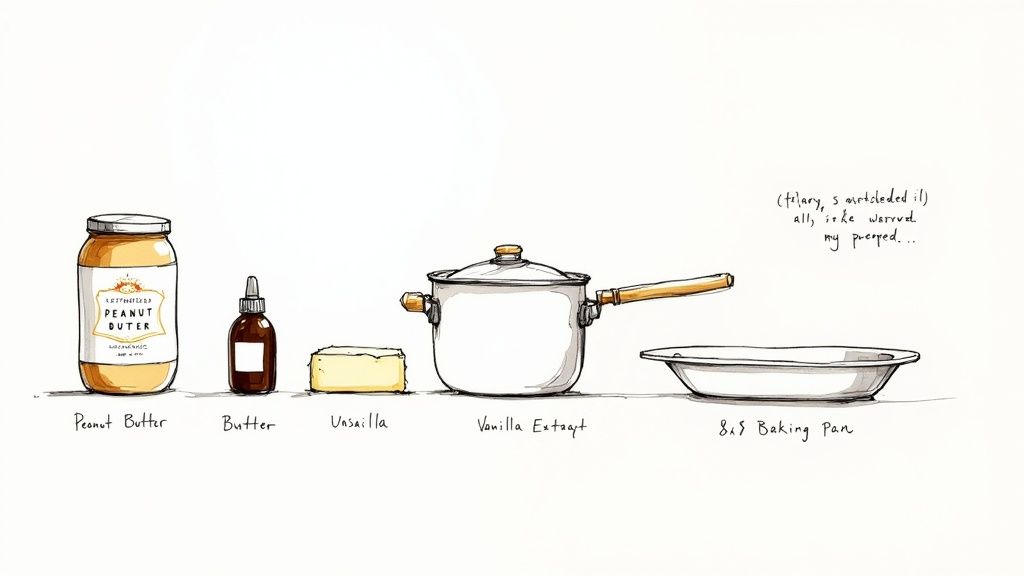
Any great recipe starts with getting organized. Before we even think about turning on the stove, let's pull everything out and make sure we have what we need. It's a simple step, but it makes the whole process feel so much easier and more enjoyable.
The most critical decision you'll make is the peanut butter. I've found that for this fudge to set up perfectly every time, you need a classic, no-stir brand like Jif or Skippy. Natural peanut butters are delicious, but their tendency to separate can leave you with an oily fudge that just won't firm up properly. It’s no wonder peanut butter is such a staple; its popularity in home cooking is part of why the market is projected to hit $9.09 billion by 2028. You can learn more about the rise of peanut butter in home confectionery.
Key Ingredient Choices
A few other ingredients can really make or break your fudge. Nailing these details is what separates good fudge from great fudge.
- Unsalted Butter: Using unsalted butter lets you control the flavor completely. You can always add a pinch of salt if you think it needs it, but you can never take it out.
- Pure Vanilla Extract: It might be tempting to grab the imitation stuff, but pure vanilla extract adds a warm, complex flavor that imitation just can't replicate. It really elevates the taste.
- Powdered Sugar: This is a non-negotiable for that signature creamy, melt-in-your-mouth texture. Granulated sugar will leave your fudge grainy. If you're used to baking by weight, this cups-to-grams conversion tool is super handy.
Essential Kitchen Tools
You don't need any high-tech equipment for this recipe, just a few basics that you likely already have.
Pro Tip: Line your pan before you do anything else. Take an 8x8 inch pan and line it with parchment paper, letting some hang over the sides. These "handles" will make it a breeze to lift the fudge out later for clean, easy slicing.
I also highly recommend using a heavy-bottomed saucepan. It heats up evenly and gently, which is key to melting the butter and sugar without scorching them. One burnt spot can unfortunately taint the whole batch.
The No-Fail Method for Making Creamy Fudge
Alright, this is where the fun starts. You can forget about fussy candy thermometers and worrying about exact temperatures. For this recipe, we're going old-school and relying on our senses—what the fudge looks and feels like. This is the secret to getting it right every single time. Our goal here is to create a perfectly smooth, rich base before the powdered sugar even enters the picture.
First things first, grab a heavy-bottomed saucepan and combine your unsalted butter and creamy peanut butter over low heat. And I mean low heat. This is probably the most common mistake people make; too much heat will cause the butter to separate, leaving you with a greasy mess instead of creamy fudge. Just stir it constantly with a spatula until it’s all melted into a beautiful, glossy liquid.
As soon as it’s melted, pull that pan right off the stove. You're not trying to cook it, just melt it. Stir in your vanilla extract, and take a look. This is your fudge foundation, and it should look smooth and totally combined before you even think about the next step.
Gradually Incorporating the Sugar
Now for the part that makes or breaks the texture. To get that signature velvety-smooth fudge, you have to add the powdered sugar slowly. Whatever you do, don't just dump it all in at once. That's a one-way ticket to a lumpy, grainy disaster.
Instead, add the powdered sugar about one cup at a time. After each addition, give it a really good stir—or even better, use a whisk—until every bit of sugar has dissolved and the mixture is smooth again. You’ll actually feel it thickening up with that last cup of sugar; it will start to pull away from the sides of the pan.
My Two Cents: The finished mixture should be really thick, almost like a stiff cookie dough. If you can pour it easily, something's not right. It should take a bit of effort to spread in the pan. That's how you know it's going to set up perfectly.
This simple infographic breaks down what we just did into three key actions.
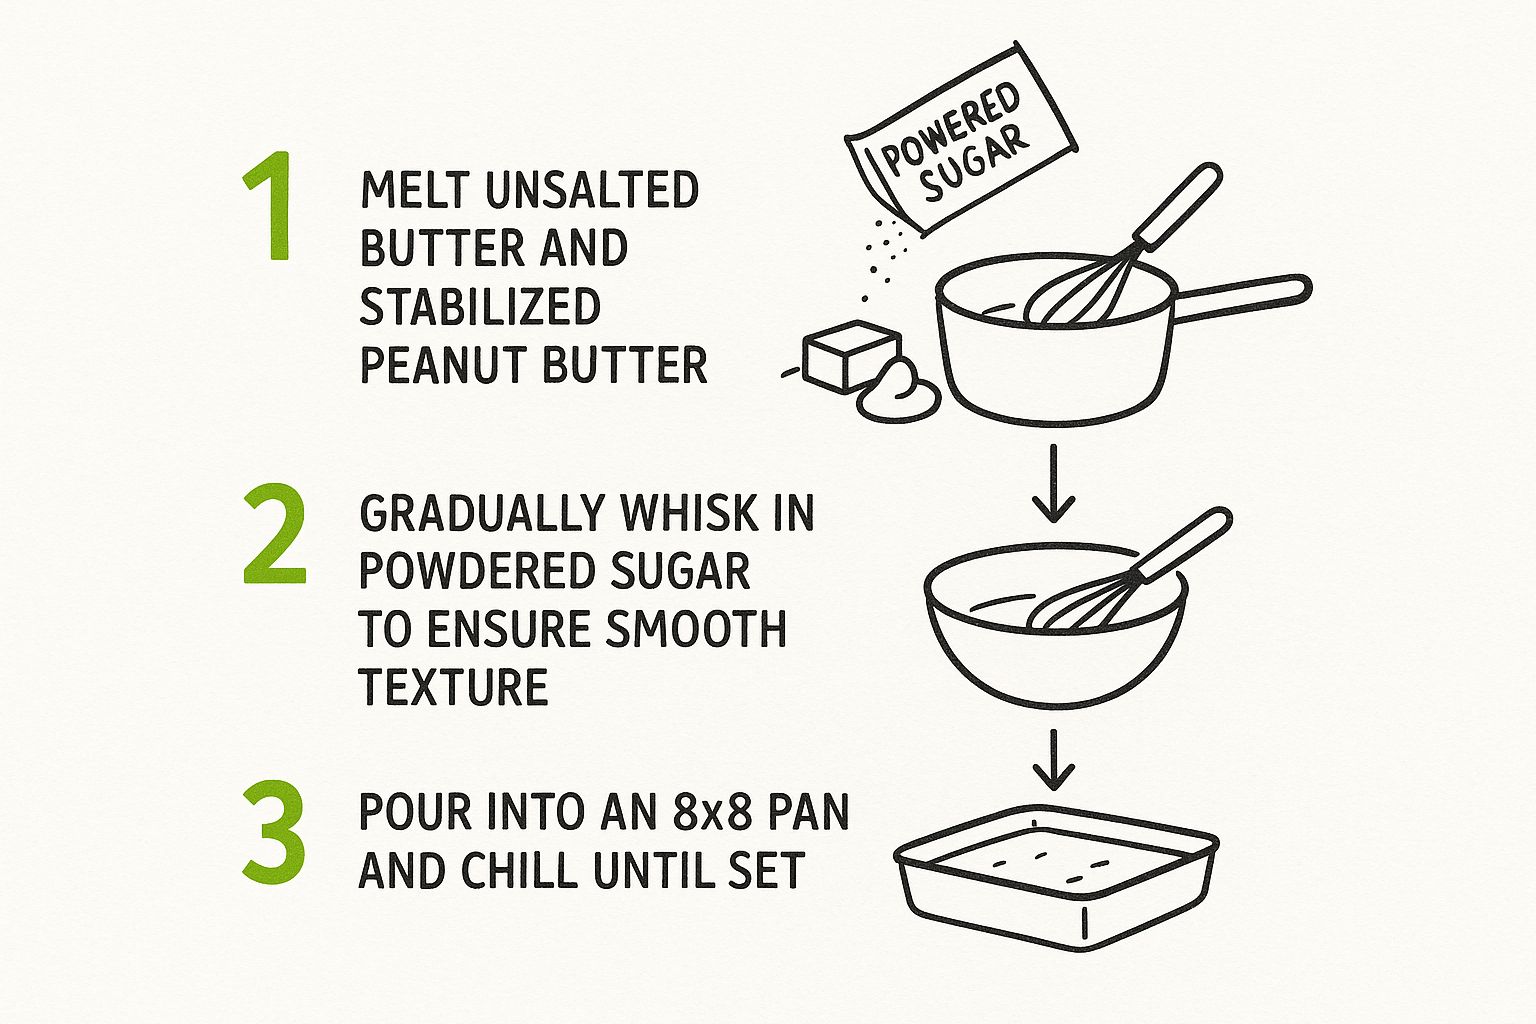
It’s a great visual reminder: melt the base, mix in the sugar slowly, and then give it plenty of time to chill.
Pouring and Chilling for a Perfect Set
Once your fudge is super thick and smooth, you need to move fast. It starts to set up pretty quickly as it cools, so get it into your prepared 8x8 inch pan right away. Use the back of a spoon or an offset spatula to press it down and spread it evenly into all the corners.
The last step is the hardest part: waiting. Cover the pan with a bit of plastic wrap and pop it in the fridge. It needs at least two hours to fully chill and set. Seriously, don't rush this! If you give it the full time, you’ll be rewarded with firm fudge that you can slice into clean, perfect squares. Once it's ready, just use those parchment paper "handles" you made to lift the whole block right out of the pan. Easy peasy.
Creative Twists and Flavor Upgrades
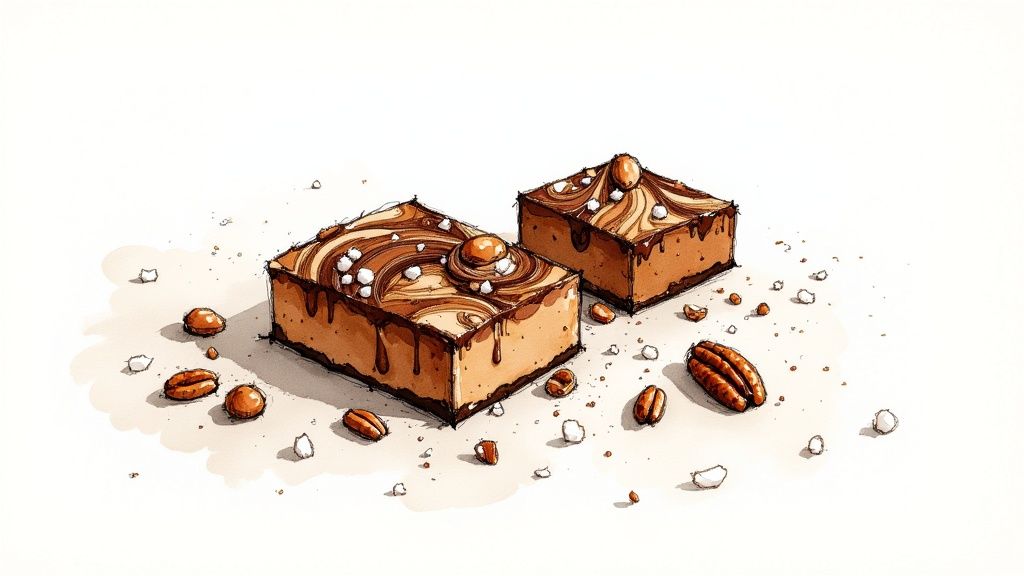
Once you've nailed the classic recipe, the real fun begins. Think of this fudge as a blank slate, ready for you to put your own personal spin on it. Making a treat that’s uniquely yours is what it's all about.
One of the simplest ways to elevate your fudge is by adding a chocolate swirl. After pressing the fudge into the pan, melt about a half-cup of semi-sweet chocolate chips. Drizzle it over the top, then grab a knife and gently drag it through the fudge to create those gorgeous, marbled patterns.
Easy Mix-In Ideas
Adding extra texture and flavor is a breeze. The trick is to add your mix-ins at just the right moment so they blend in perfectly without messing up that creamy texture you worked so hard for.
- Go for the Crunch: Stir in a half-cup of toasted pecans or chopped peanuts right before pouring the fudge into the pan. A quick toast in a dry skillet makes a world of difference in their flavor.
- Sweet & Salty: This one's a classic for a reason. Once the fudge is in the pan, sprinkle a good pinch of flaky sea salt over the top. It makes the peanut butter flavor sing.
- Rocky Road Style: Gently fold in a cup of mini marshmallows just before you pour. They create little pockets of chewy goodness that are a fantastic contrast to the smooth fudge.
The beauty of peanut butter fudge is how adaptable it is. You can tweak it for any occasion or dietary preference, which is a big reason for its enduring popularity. To learn more about how peanut butter is taking the dessert world by storm, you can check out the latest market insights.
A Pro Tip for Deeper Flavor: For a more complex, grown-up taste, try adding one teaspoon of instant espresso powder along with the vanilla. I promise it won't make your fudge taste like coffee—it just deepens the roasted, nutty flavor of the peanut butter in a way that's surprisingly delicious. It’s a small tweak that makes a huge impact.
What to Do When Your Fudge Doesn't Behave
Even with a straightforward recipe like this one, things can occasionally go sideways in the kitchen. Don't worry—most peanut butter fudge problems are easy to diagnose and even easier to fix. Let's walk through the common culprits.
Is your fudge too soft or refusing to set? The weather might be to blame. High humidity can sneak extra moisture into your mixture, keeping it from firming up. A quick trip to the freezer for about 30-45 minutes usually does the trick.
On the flip side, if you're dealing with a dry, crumbly mess, you probably overmixed it after adding the powdered sugar. The moment the sugar disappears and the mixture is thick, stop stirring. If you keep going, the fats can separate, which creates that brittle, unappealing texture.
Fixing Texture Troubles
A greasy surface is another frequent problem. This almost always happens when you melt the butter and peanut butter over heat that’s too high, causing the oil to separate out. Remember to use low, gentle heat to keep everything nicely emulsified.
And what about grainy fudge? That gritty texture is a dead giveaway that the powdered sugar didn't fully dissolve.
The secret is to add the sugar gradually, about one cup at a time. Make sure each addition is mixed in completely until it's smooth before adding the next. Sifting the sugar first also makes a huge difference.
Understanding these simple "whys" helps you nail the technique every time. Of course, even perfect fudge can leave a sticky pan behind. For easy cleanup, take a look at our guide on how you clean baking sheets. Taking these little steps will help you turn potential fudge fails into consistent, creamy successes.
Answering Your Peanut Butter Fudge Questions
Even the most straightforward recipes can leave you with a question or two. I've been making fudge for years, and I've run into just about every little issue you can imagine. Let's walk through some of the most common questions so you can get a perfect batch on your very first try.
Can I Use Natural Peanut Butter in This Recipe?
I get this question all the time! For this specific recipe, you really want to stick with a conventional, no-stir peanut butter like Jif or Skippy.
Natural peanut butters have a ton of oil that tends to separate, which can make your fudge greasy and stop it from setting up properly. If it’s all you have, make sure you stir it like crazy to reincorporate all that oil, but just know your fudge might come out a bit softer than intended.
How Should I Store Homemade Fudge and How Long Does It Last?
The best way to keep that perfect texture is in an airtight container at room temperature. It'll stay fresh for about a week. If you like your fudge on the firmer side, you can pop it in the fridge where it will last for 2-3 weeks.
And yes, fudge freezes beautifully! Here's how I do it:
- Wrap the whole block (or individual squares) tightly in plastic wrap.
- Put the wrapped fudge inside a freezer-safe bag or container.
- It'll keep in the freezer for up to 3 months.
When a craving hits, just let it thaw on the counter for a bit before serving.
A Quick Tip on Texture: If your fudge turns out grainy, it's almost always because the powdered sugar didn't fully dissolve. This can happen if you dump it all in at once. The easy fix is to add the sugar in batches—about a cup at a time—and mix until it’s completely smooth before adding more.
Can This Fudge Recipe Be Doubled?
Absolutely! This recipe doubles perfectly. The only change you need to make is using a larger pan, like a 9x13 inch pan, so the fudge isn't too thick and sets up right.
All the cooking times and steps stay exactly the same. If you're curious about how doubling it changes the nutrition info, you can plug the ingredients into a recipe calorie calculator for a quick estimate.
At Recipe One, we help you organize your favorite recipes from anywhere online. Click here to turn your scattered cooking inspiration into a clean, searchable library with Recipe One.

