Ever wonder what the real secret is to those impossibly fluffy, cloud-like omelets you get at a great brunch spot? It’s not a splash of milk or some mystery ingredient. It's much simpler than that.
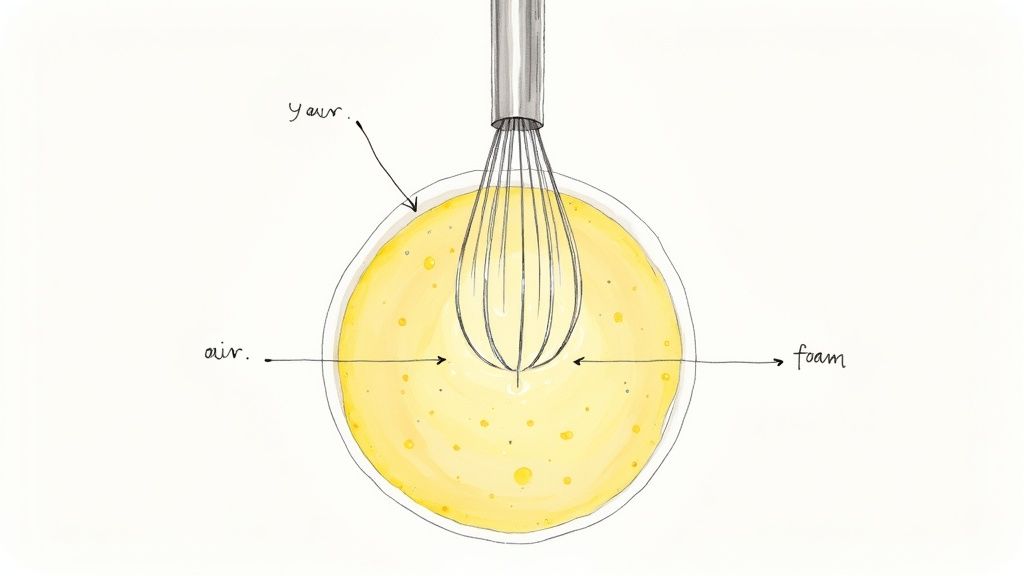
The key is air. That's it. By whisking your eggs with intention, you're whipping tiny air bubbles into the mix. When those bubbles hit the heat, they expand, giving you that signature light, airy texture that separates a good omelet from a great one.
The Simple Science Behind a Fluffy Omelet
A lot of us were taught to add a bit of milk or cream for a fluffier result. While a tiny splash of water can create a little steam, the real magic happens before the eggs even touch the pan. It all comes down to basic food science—changing the egg's structure from the get-go.
When you start whisking, you're not just blending yolks and whites. You're forcefully trapping air, creating a delicate foam. Think of it as a network of egg proteins holding onto countless little air pockets.
As this mixture cooks over gentle heat, two things happen at once:
- Those trapped air bubbles expand, making the omelet puff up right before your eyes.
- The egg proteins cook and set, locking that new, airy structure in place.
This process is what gives you that incredible volume. If you skip this step, you just get a flat, dense layer of cooked egg—perfectly fine for a scramble, but not the showstopper omelet we're aiming for.
Why You Can't Skimp on the Whisking
To get that perfect texture, you need a stable foam. This means you need to whisk your eggs for a solid 1-2 minutes. I know it feels like a long time, but it’s worth it. You're looking for a pale yellow, frothy mixture that has almost doubled in size.
While a good old-fashioned whisk works just fine, an electric mixer can be a game-changer. Studies show electric mixers can achieve over 30% more aeration than whisking by hand, giving you a consistently fluffier result. If you're curious about how different tools measure up, you can dig into some fascinating kitchen appliance studies.
The bottom line is simple: More air equals more fluff. Don't rush this part. Your visual cue that you're ready to cook is when the eggs are light, foamy, and visibly larger. That’s when you know you’ve set yourself up for success.
To make it even clearer, I've broken down the essential components into four key pillars. Mastering these will get you that perfect omelet every time.
The Four Pillars of Fluffy Omelet Success
| Pillar | Why It Matters | Quick Tip |
|---|---|---|
| Aeration | Vigorous whisking incorporates air, which expands with heat to create a light, puffy texture. | Whisk for a full 1-2 minutes until the eggs are pale, frothy, and have doubled in volume. |
| Heat Control | Gentle, consistent heat cooks the eggs evenly without browning them too quickly, allowing the air bubbles to expand fully. | Cook on medium-low heat. The pan is ready when a drop of water sizzles gently, not aggressively. |
| The Right Pan | A non-stick skillet ensures the delicate omelet releases easily without tearing, preserving its structure. | Use an 8-inch non-stick pan for a 2-3 egg omelet. It’s the perfect size for easy folding. |
| Timing | Pulling the omelet from the heat just before it’s fully set prevents overcooking and keeps it tender. | Fold it when the top is still slightly moist. The residual heat will finish cooking it on the plate. |
Keep these four elements in mind, and you'll have everything you need to move from making just okay omelets to truly incredible ones.
Your Omelet-Making Toolkit
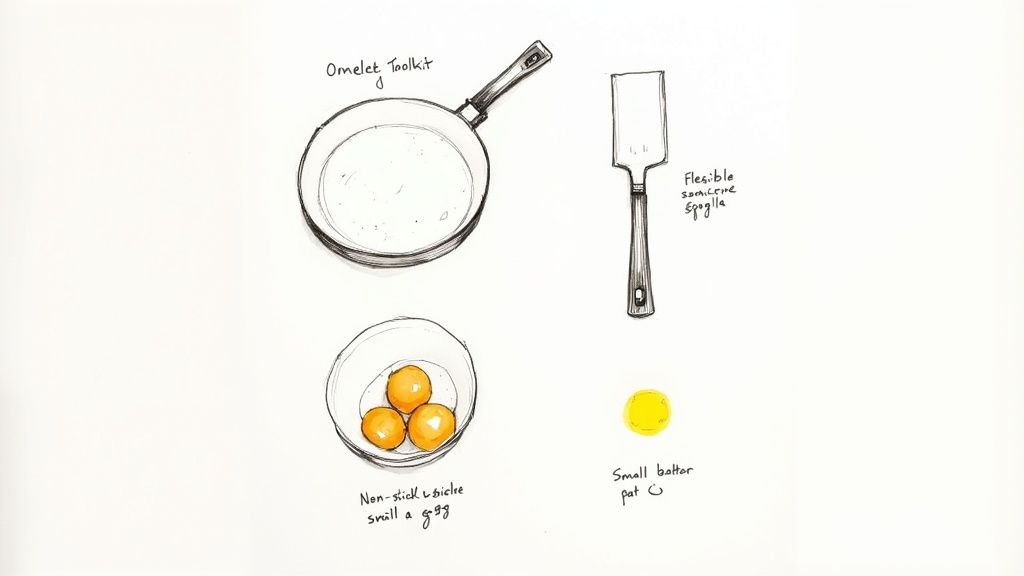
Before you even crack an egg, having the right gear on hand makes all the difference. You don't need a kitchen full of fancy gadgets, just a few key items that will help you nail that perfect, airy omelet every time.
The star of the show is an 8-inch non-stick skillet. Its size is perfect for a two or three-egg omelet, and the sloped sides are your best friend when it comes time to fold and slide it onto the plate. A good non-stick surface means you won’t be scraping stuck-on eggs, which is the enemy of a fluffy texture.
Next up, you'll need a flexible silicone spatula. This is what you'll use to gently nudge the cooking eggs away from the edges. Silicone is great because it won't scratch your pan and it’s heat-resistant, but more importantly, its flexibility allows you to get under that delicate egg structure without tearing it.
And of course, fresh eggs are a must. I always let mine sit out for a few minutes to come closer to room temperature—they just seem to whip up with more volume that way. As for cooking fat, that’s a whole topic on its own. For a deep dive, you can explore the great kitchen debate: olive oil vs. butter in your cooking.
Your Go-To Tools
Think of these as your non-negotiables for omelet perfection.
- Non-stick skillet: This ensures an easy release. Remember to use moderate heat to prevent the bottom from browning too quickly.
- Flexible silicone spatula: Its gentle touch is crucial for preserving that light, airy structure you worked so hard to create.
- Whisk or electric mixer: While a whisk works just fine, an electric mixer can increase aeration by over 30%, giving you an incredibly light result with less elbow grease.
Here’s a quick breakdown of why these tools are so important:
| Tool | Why It Matters | My Pro-Tip |
|---|---|---|
| Non-stick pan | Provides even heating and a smooth release. | Preheat it over medium-low. You'll know it's ready when a drop of water sizzles gently, not aggressively. |
| Spatula | Allows for delicate handling of the curds. | Run it under hot water for a second right before using it. This helps prevent the eggs from sticking to it. |
Getting the cooking fat right is just as important as the tools. Butter adds a wonderful richness and flavor, while a neutral oil can handle slightly higher heat. A little trick I learned is to add a tiny splash of water or milk to the eggs—it creates steam as it cooks, giving your omelet an extra lift.
It’s no surprise that specialized pans are popular. The global market for omelet pans was valued at around $500 million in 2025 and is expected to hit $850 million by 2033. It just goes to show how much people value the right equipment for the job!
By the way, if you're a fan of cast iron, a well-seasoned skillet can also work beautifully. We've got a whole guide on how to season cast iron skillets if you want to go that route.
Great tools empower home cooks to make fluffy omelets without frustration.
Having these simple items ready and within reach turns omelet-making from a stressful scramble into a smooth, enjoyable process. With this toolkit, you're all set to cook your best omelet yet.
Mastering the Fluffy Omelet Technique
This is where the magic really happens—turning those beautifully aerated eggs into a perfect, cloud-like omelet. The truth is, making a great omelet is less about following rigid instructions and more about developing a feel for it. With a bit of practice, you'll start to trust your instincts.
It all goes back to that vigorous whisking we talked about earlier. You're aiming for a pale, frothy mixture that's visibly grown in volume. You're not just mixing yolks and whites; you're whipping air into the eggs, which is what gives them that incredible lift.
Perfecting Your Heat Management
If there's one mistake that kills a fluffy omelet, it's a pan that's too hot. You're looking for a gentle, steady medium-low heat. This gives those tiny air bubbles you created time to expand slowly, building that coveted texture without making the bottom tough and brown.
Give your non-stick pan a minute or two to preheat before you add any butter or oil. A properly heated pan is the key to an omelet that cooks evenly and slides right out when you're done.
Key Takeaway: Patience is your most important ingredient. Cooking an omelet slowly over gentle heat is non-negotiable for a soft, tender result. Rushing it on high heat will just leave you with a flat, rubbery disappointment.
For those who love getting things just right, remember that small changes in ingredient amounts can make a difference. If you're curious about getting super consistent results, a quick conversion from https://www.recipeone.app/cups-to-grams can be a huge help.
Once the pan is hot and the butter is melted and just starting to foam, it's go-time.
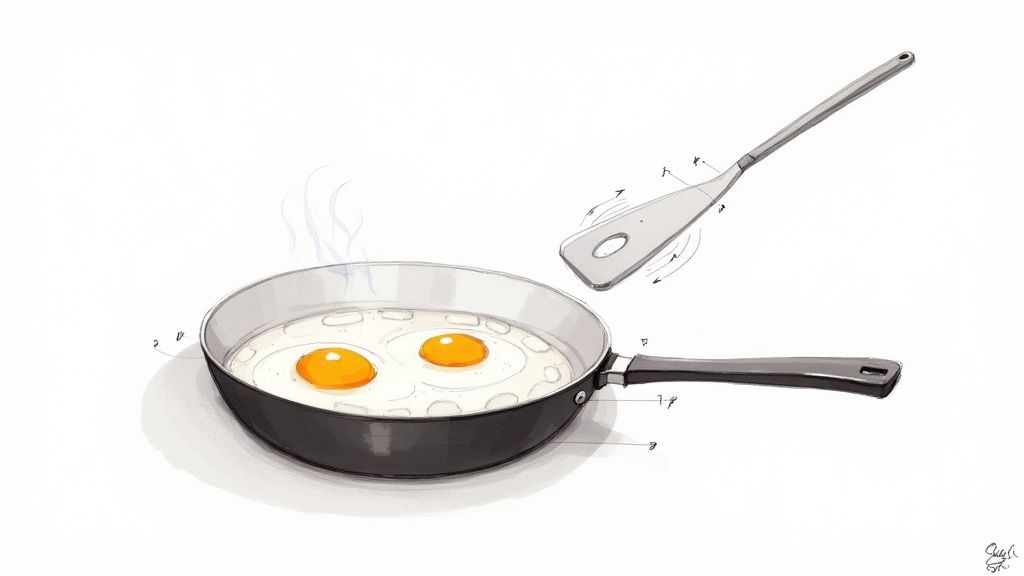
The Gentle Stir and Set
Pour the whisked eggs right into the center of the pan. Don't touch them! Just let them sit for about 20-30 seconds until you can see the very edges starting to set.
Now, grab your spatula and gently push the cooked eggs from the edge toward the center. As you do, tilt the pan a little. This lets the runny, uncooked egg from the top flow into the gap you just made.
- Keep it moving: Continue this gentle push-and-tilt motion, working your way around the pan.
- Forming soft curds: You're not scrambling the eggs, but rather creating large, soft curds that build the omelet's fluffy structure.
- Know when to stop: Stop when the eggs are about 75% set. The top should still look a bit wet and custardy, but not liquid.
This whole process moves quickly—it should only take a couple of minutes. Once you hit that sweet spot, smooth the curds into an even layer. This gives you a stable base for any fillings. For more tips on leveling up your kitchen skills, you can find a lot of expert cooking insights and techniques online.
Now, you’re ready for the final, satisfying fold.
Pro-Level Omelets and Common Mistakes to Avoid
https://www.youtube.com/embed/mqmDRQpMcU8
So, you've got the basics down and are ready for the big leagues. Let's talk about a technique that creates a truly next-level result: the Soufflé Omelet. This method is all about maximizing aeration for an unbelievably light, almost cloud-like texture.
The secret here is separating your eggs. Whip the yolks like you normally would, but the whites get their own special treatment. You’ll want to whip them—an electric mixer makes this a breeze—until they form those beautiful, stiff, glossy peaks. This creates a really stable foam that gives the omelet its signature lift.
Once you have those peaks, gently fold the whipped whites into the yolks. The key word here is gently. You worked hard to get all that air in there, so don't knock it out now! The final mixture will be light, airy, and much larger in volume. Cook this one low and slow, and watch it puff up like magic in the pan.
Troubleshooting Your Omelet Fails
Of course, even the best of us have off days in the kitchen. A small misstep can quickly turn a fluffy dream into a flat, rubbery reality. Let's walk through some of the most common omelet problems so you know exactly what went wrong and how to fix it.
-
The Problem: Your omelet is tough and rubbery.
The Fix: Your pan is definitely too hot. Blasting the eggs with high heat makes the proteins seize up and squeeze out all their moisture. Stick to medium-low heat for a tender, delicate texture. The right fat is also crucial; this cooking oil smoke point chart is a great resource for seeing which oils can handle the heat without burning. -
The Problem: It looks flat and sad.
The Fix: You need to whisk more—a lot more. Fluffiness comes from trapping air in the eggs. You should be whisking vigorously for at least 1-2 minutes, or until the mix looks pale yellow, frothy, and has clearly grown in volume. -
The Problem: It fell apart the second you added fillings.
The Fix: You went overboard! A classic rookie mistake. A perfectly cooked omelet is delicate and can't handle a mountain of fillings. A few tablespoons is all you need, and always add them right before you make that final fold.
Pro Tip: Never, ever add cold, wet fillings straight into your omelet. If you're using things like mushrooms or spinach, give them a quick sauté in a separate pan first. This cooks off the extra water and prevents a soggy, tragic mess.
Figuring out how do you make fluffy omelets time and time again really comes down to nailing these fundamentals. By keeping your heat in check, whisking like you mean it, and being smart with your fillings, you’ll be serving up perfect omelets every single time.
Creative Fillings That Complement Your Omelet
A beautiful, fluffy omelet is the perfect canvas, but the wrong fillings can turn it into a soggy mess. The number one rule I've learned over the years? Always pre-cook your fillings. This is non-negotiable, especially for watery vegetables like mushrooms, spinach, or zucchini. Sautéing them first cooks off that excess moisture so it doesn't seep into your delicate eggs and ruin that airy texture you worked so hard for.
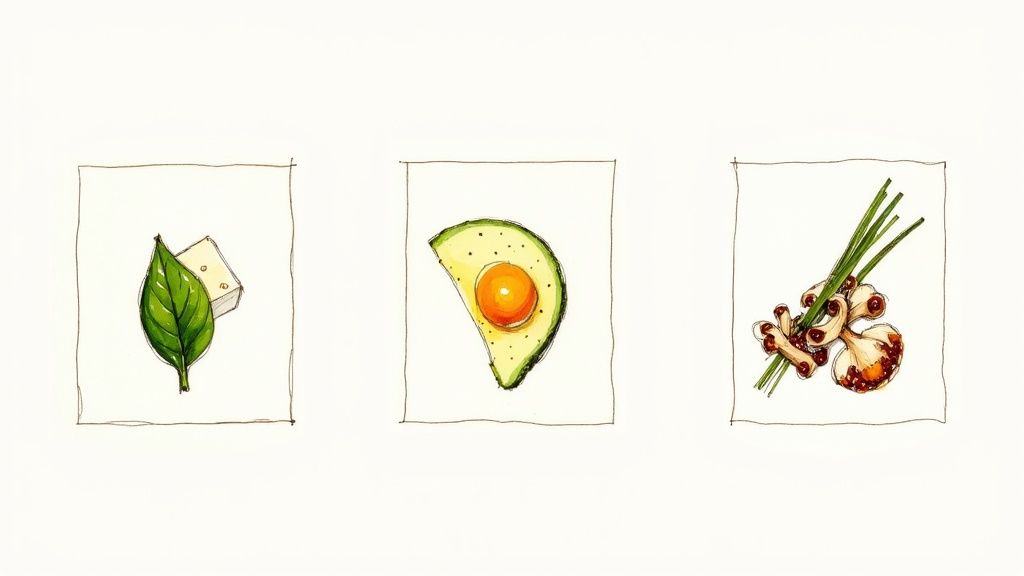
Sure, ham and cheese is a classic for a reason, but why not think a little bigger? I like to build my omelets around a theme.
- Mediterranean Vibe: Sautéed spinach with crumbled feta and a few sun-dried tomatoes.
- West Coast Classic: Creamy avocado, melty Monterey Jack, and a sprinkle of fresh chives.
- Something Hearty: Leftover roasted potatoes, caramelized onions, and a sharp cheddar.
The possibilities are pretty much endless. It’s a great way to clean out the fridge, and you can get more ideas with a guide to find a recipe by ingredients on hand.
The best time to add your fillings is right before you make that final fold. This keeps everything warm and contained without weighing down the eggs as they set.
It's no surprise people love a good omelet. They account for nearly 19% of all the times adults in the U.S. eat eggs. We’re all looking for satisfying, protein-packed meals, and an omelet checks all the boxes. You can even dig into more omelet consumption trends on tastewise.io. By being just a little more thoughtful with your fillings, you can take a simple breakfast and turn it into something special.
Common Omelet Questions, Answered
Let's dive into some of the questions that always come up when you're on the quest for the perfect omelet. Nailing these little details is often the last piece of the puzzle.
Can I Make an Omelet with Just Egg Whites?
You absolutely can, and the method is pretty much the same. You might even be surprised at how well it works.
Egg whites are almost pure protein and water, which means they can whip up to an impressive volume—even more than whole eggs. Just whisk them vigorously until they're super frothy, almost like you're making a meringue, and then pour them into the hot pan. You’ll get an incredibly light, cloud-like omelet. The only trade-off is you'll miss out on that rich, savory flavor the yolks bring to the party.
Help! Why Did My Omelet Fall Flat?
A little bit of settling is totally normal as the omelet cools and steam escapes. But if it goes from puffed and proud to sad and flat in seconds, the likely culprit is undercooking.
When the eggs aren't cooked through, their protein structure isn't strong enough to hold all that air you worked so hard to whip in.
Pro Tip: Before you go for the fold, look at the top of the omelet. It should look set and just a little moist, but definitely not runny. A steady, medium-low heat is your best friend here—it cooks the eggs all the way through without turning them tough.
Does Milk Really Make Omelets Fluffier?
This is probably the biggest myth in the omelet world. It sounds like it should work, right? But adding milk or cream actually makes omelets denser, not fluffier.
The dairy adds a nice creamy texture, but the extra liquid weighs the eggs down. True fluffiness comes from one thing: air. If you want a little extra puff, try adding a tiny splash of water (about a teaspoon). The water turns to steam in the pan, giving the omelet a little lift as it cooks.
And if you're curious about how these small additions affect the nutrition of your breakfast, a good recipe calorie calculator can break it down for you.

